Building a pergola can be a great addition to any home. It can give you a nice, shady space that really adds real character to your yard. Putting one up is quite easy to do it yourself. If you are interested in having a DIY pergola, we’re taking you through the job, step by step.
Let’s start!
- Mark out the area of where you want your pergola to go
- Build your profiles: place these at least half a meter back from your outside corners
- Run string lines from your profiles which will give you the outside area of your pergola (Where the string lines meet will be the outside corner of your posts)
- Measure the diagonals to make sure your pergola is square
Install your corner posts
- Dig your holes 400mm square by a minimum 500mm deep
- Place a concrete block in the bottom of your holes for the posts to sit on so they are off the ground
- Place the post in the hole up against the string lines. Brace it, make sure it’s plumb and pour in the concrete
- Use a stick to vibrate the concrete to ensure there are no air bubbles in there
- Let the concrete dry for 24 hours
- Remove the braces, string lines and profiles
- Mark the posts to length and then mark the rebates for the bearers to sit on
- Use an off cut of the bearer to mark the rebate in the post
- Knock in a nail on the rebate mark, to transfer the rebate mark onto the other posts
- Place a straight piece of timber on the nail, use your spirit level to establish level, and transfer the mark to the next posts
- Trim the tops of the posts and cut out the rebates
Time to cut the bearers
- The pergola in this example 3.5 meters long
- We want the bearers to overhang by 30 cm at each side so the bearers will be 4.1 meters long in total
- Interested in other sizes? Feel free to change this!
- Cut/saw the bearers
Shape it! Shape the bearers
- Come in 300mm from the end and down 35mm
- Before you put up the bearers, clamp them together then mark the positions of the 8 rafters that will sit on them. Use an offcut of a rafter to get the width right.
- The pergola is 3 meters wide, so the rafters will be 3.6 meters long to include a 300mm overhang on each side. Shape the rafters the same way you shaped the bearers.
- The battens sit on top of the rafters. The pergola is 3.5 meters long, so the battens will be 3.6 meters long. This includes a 50mm overhang on each side. A quick way to mark their positions is to line all the rafters up and mark them at the same time. These battens are being spaced 300mm apart, but you can create any pattern you want.
- Place the bearers in the rebates and clamp them while you drill the hole for the bolts. Put the bolts in.
- Lay the rafters on the bearers in their pre marked positions. One skewed nail on each side is all that’s needed
- Lay the battens on top of the rafters in their marked positions, make sure you have the 50mm overhang and nail in place. Handy hint - if you pre-drill the holes in each end you will stop the timber splitting.
- In exposed areas or a structure any higher than this, it is advisable to attach braces from your bearer to your posts on a 45-degree angle. This should be a 100 x 50 H3.2, approximately 1m long.
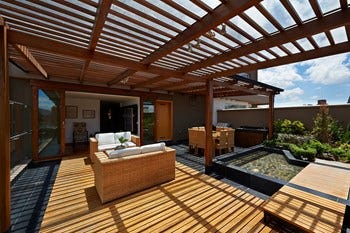
Congrats, you finished your DIY pergola: time to decorate and relax!
Inspiration tips:
A pergola comes in different shapes and sizes. The only condition: a real pergola is always free and only forms a frame.
A pergola can serve various – beautiful – purposes, such as:
- An overgrown pergola with tree branches
- A pergola with grapes
- A nice place for shade and / or sun protection of shade or harmony cloth
- A pergola with swing bench to relax on
Time Needed
2 days
List of Materials
- Pergola lumber
- Posts
- Braces
- Bearers
- Nails
- Concrete
- Rafters
- Battens
List of Tools
- Hammer
- Sockets
- Hand saw
- Levels & chalk lines
- Measuring tape / ruler / square
- Electric drill
- Spanners
- String line
- Spade
- Ladder
- Post-hole borer / shovel