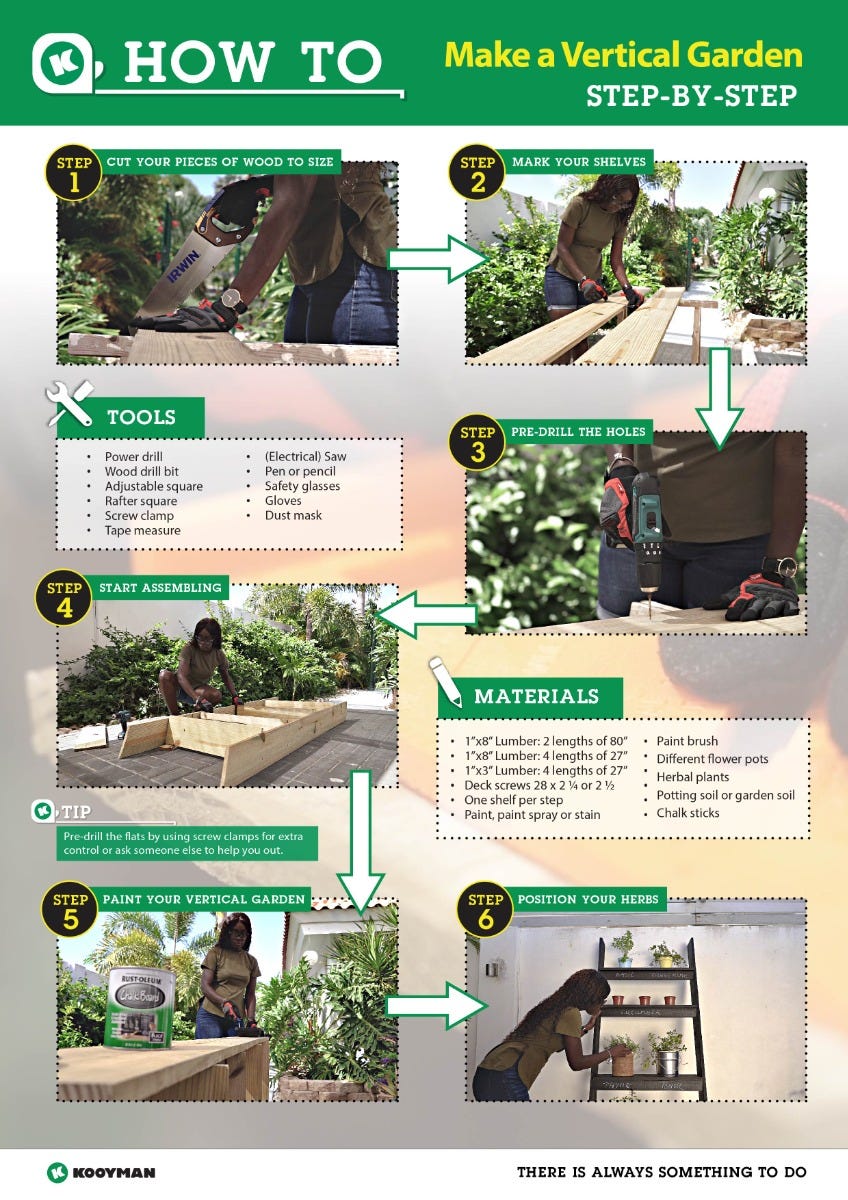
Shape your outdoor space with an extraordinary vertical garden! Vertical gardens are perfect to bring any wall to life by creating your own color scheme with the different plants you choose. To create your own vertical garden, Kooyman is happy to help!
The vertical herb garden
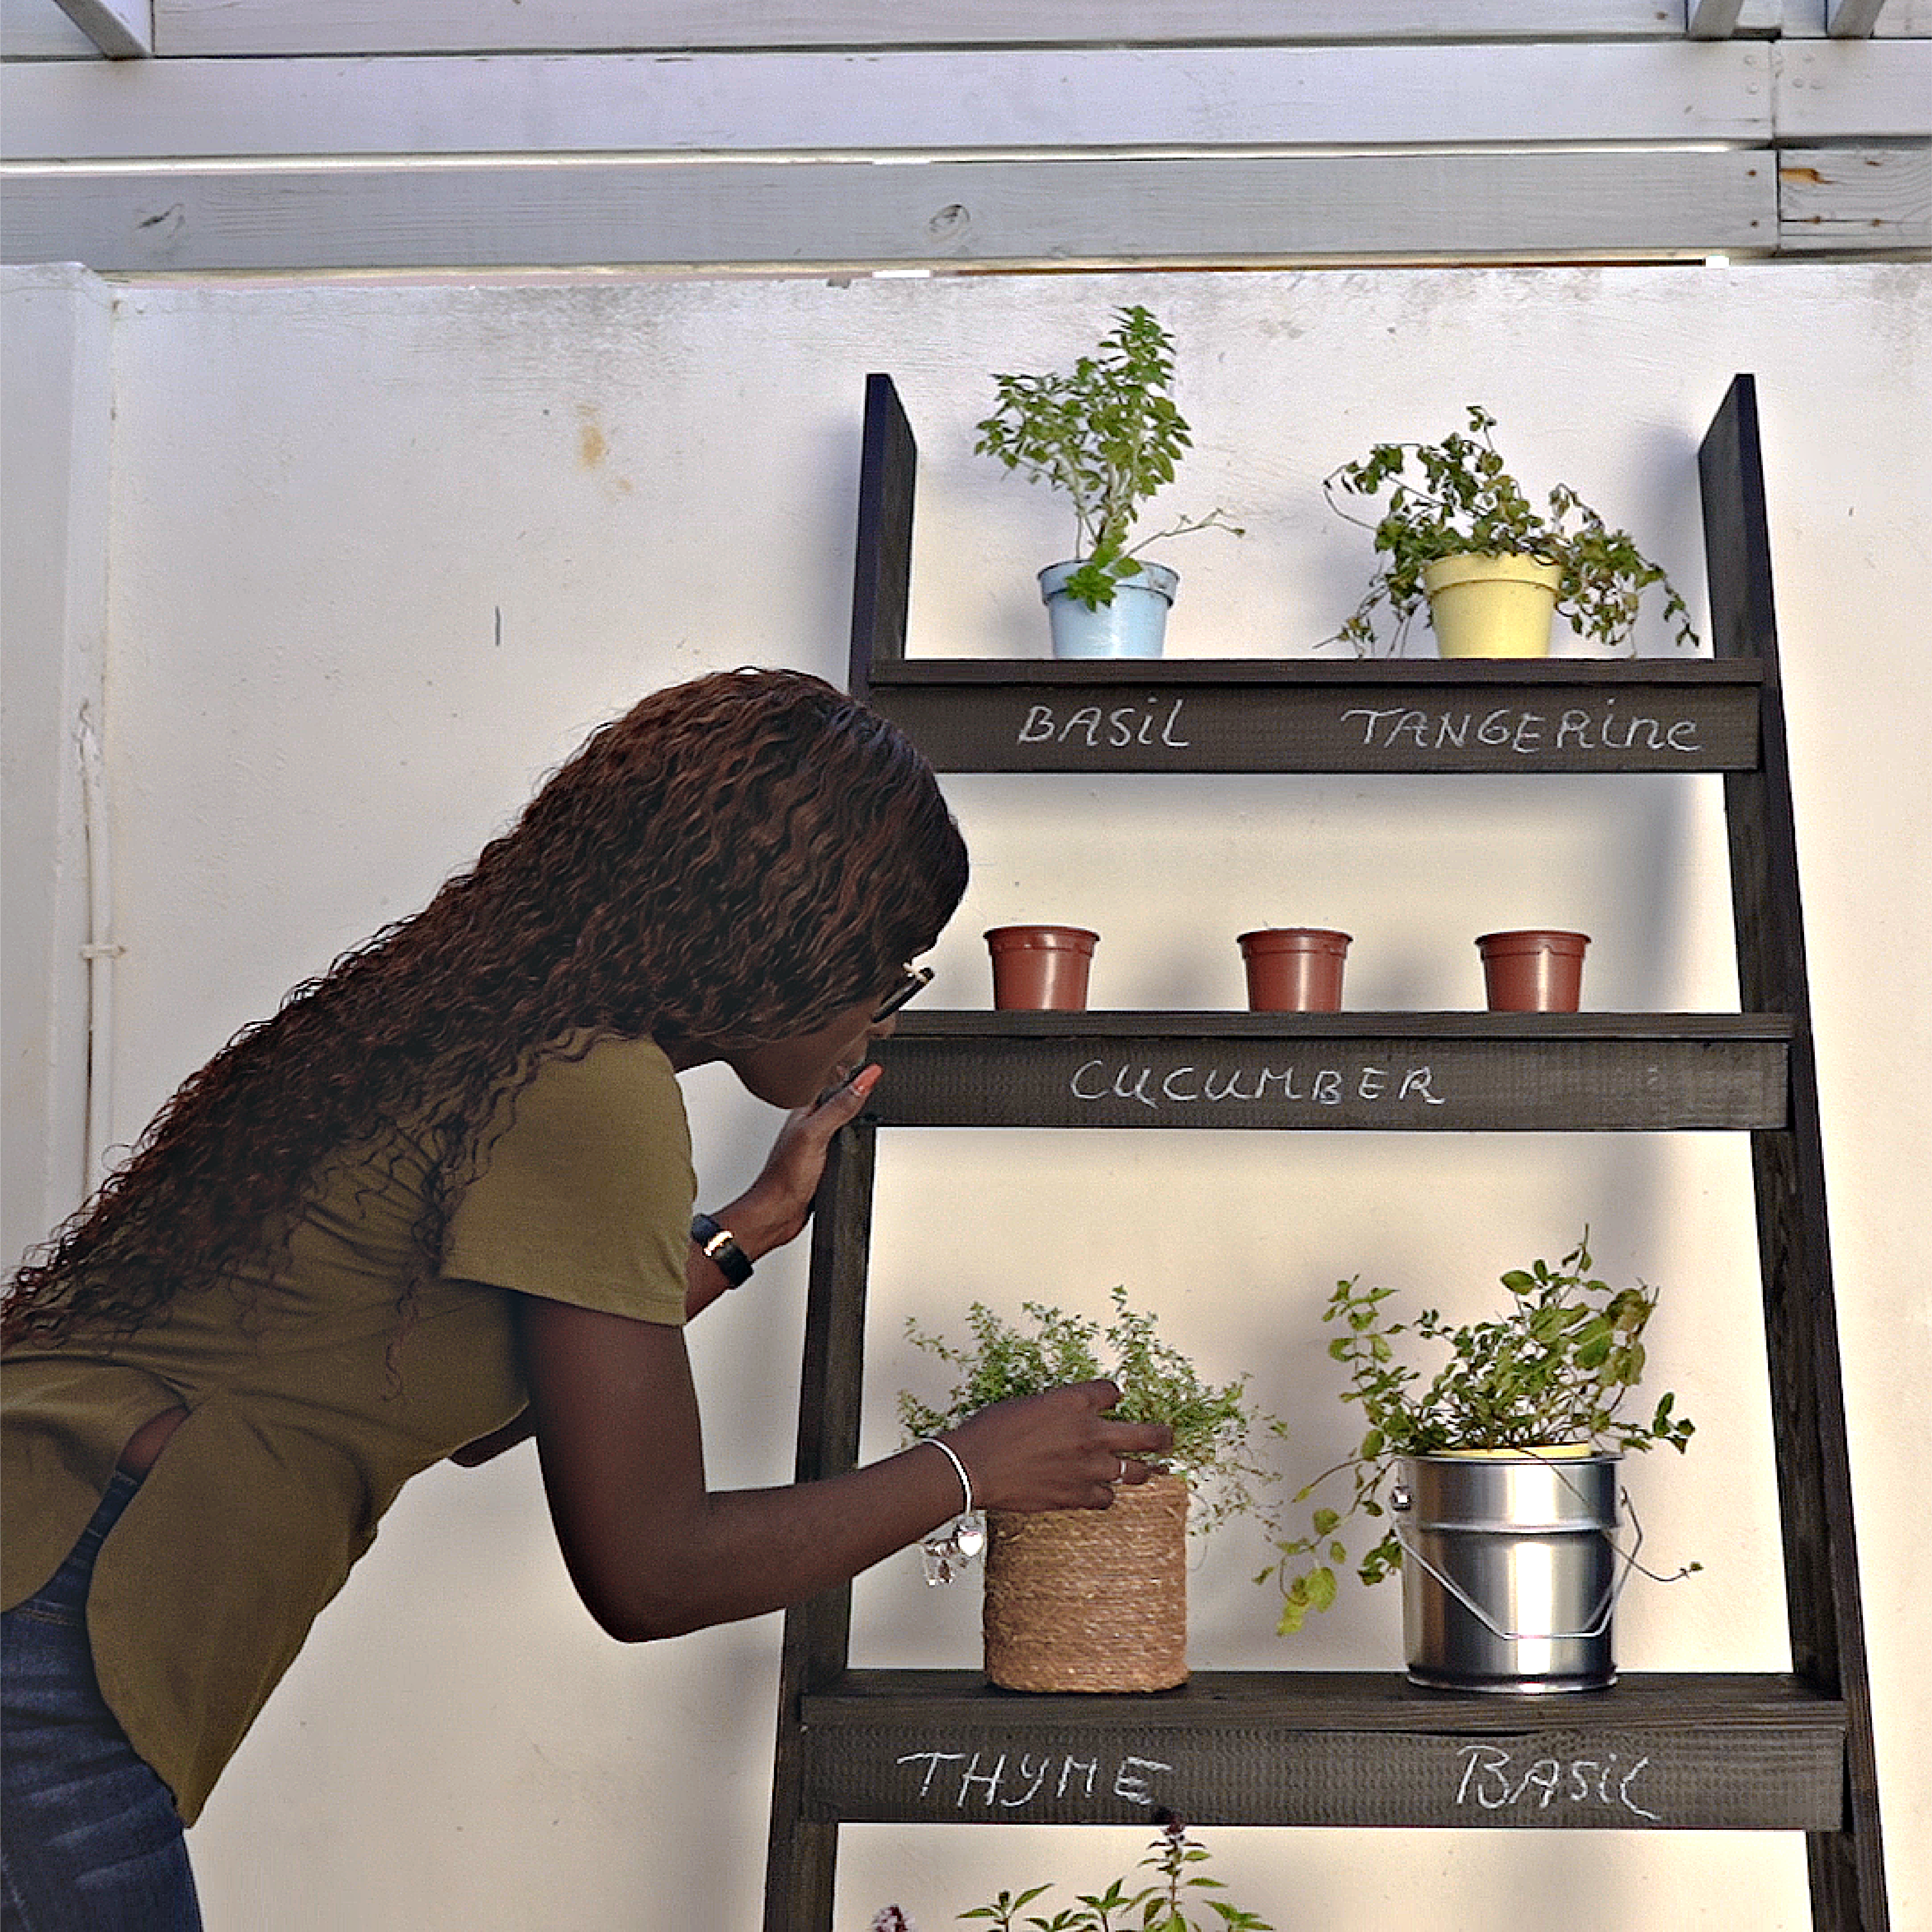
We recommend to include a variation of herbs in your vertical garden, think of herbs such as mint, chives, parsley, basil, thyme, rosemary, and oregano. These are versatile herbs that can be used in a variety of ways in your kitchen.
Before we begin, think about the perfect location in your outdoor space, as we need to take into consideration elements of nature such as the sun, wind, and rain.
Step 1: Cut your pieces of wood to size
Get started by cutting your pieces of wood to the right size. Measure the first two planks up to around 80 inches, depending on how high you want your garden to be. Use the adjustable square to saw the plank with an angle of 15 degrees, you can either use a hand saw or electrical saw for this step.
Continue cutting 4 planks into 27 inches in length. These should be sawn in a 90 degree angle as they will be the shelves.
The same process can be repeated with the slats, make 4 pieces of 27 inches with a 90 degree angle.

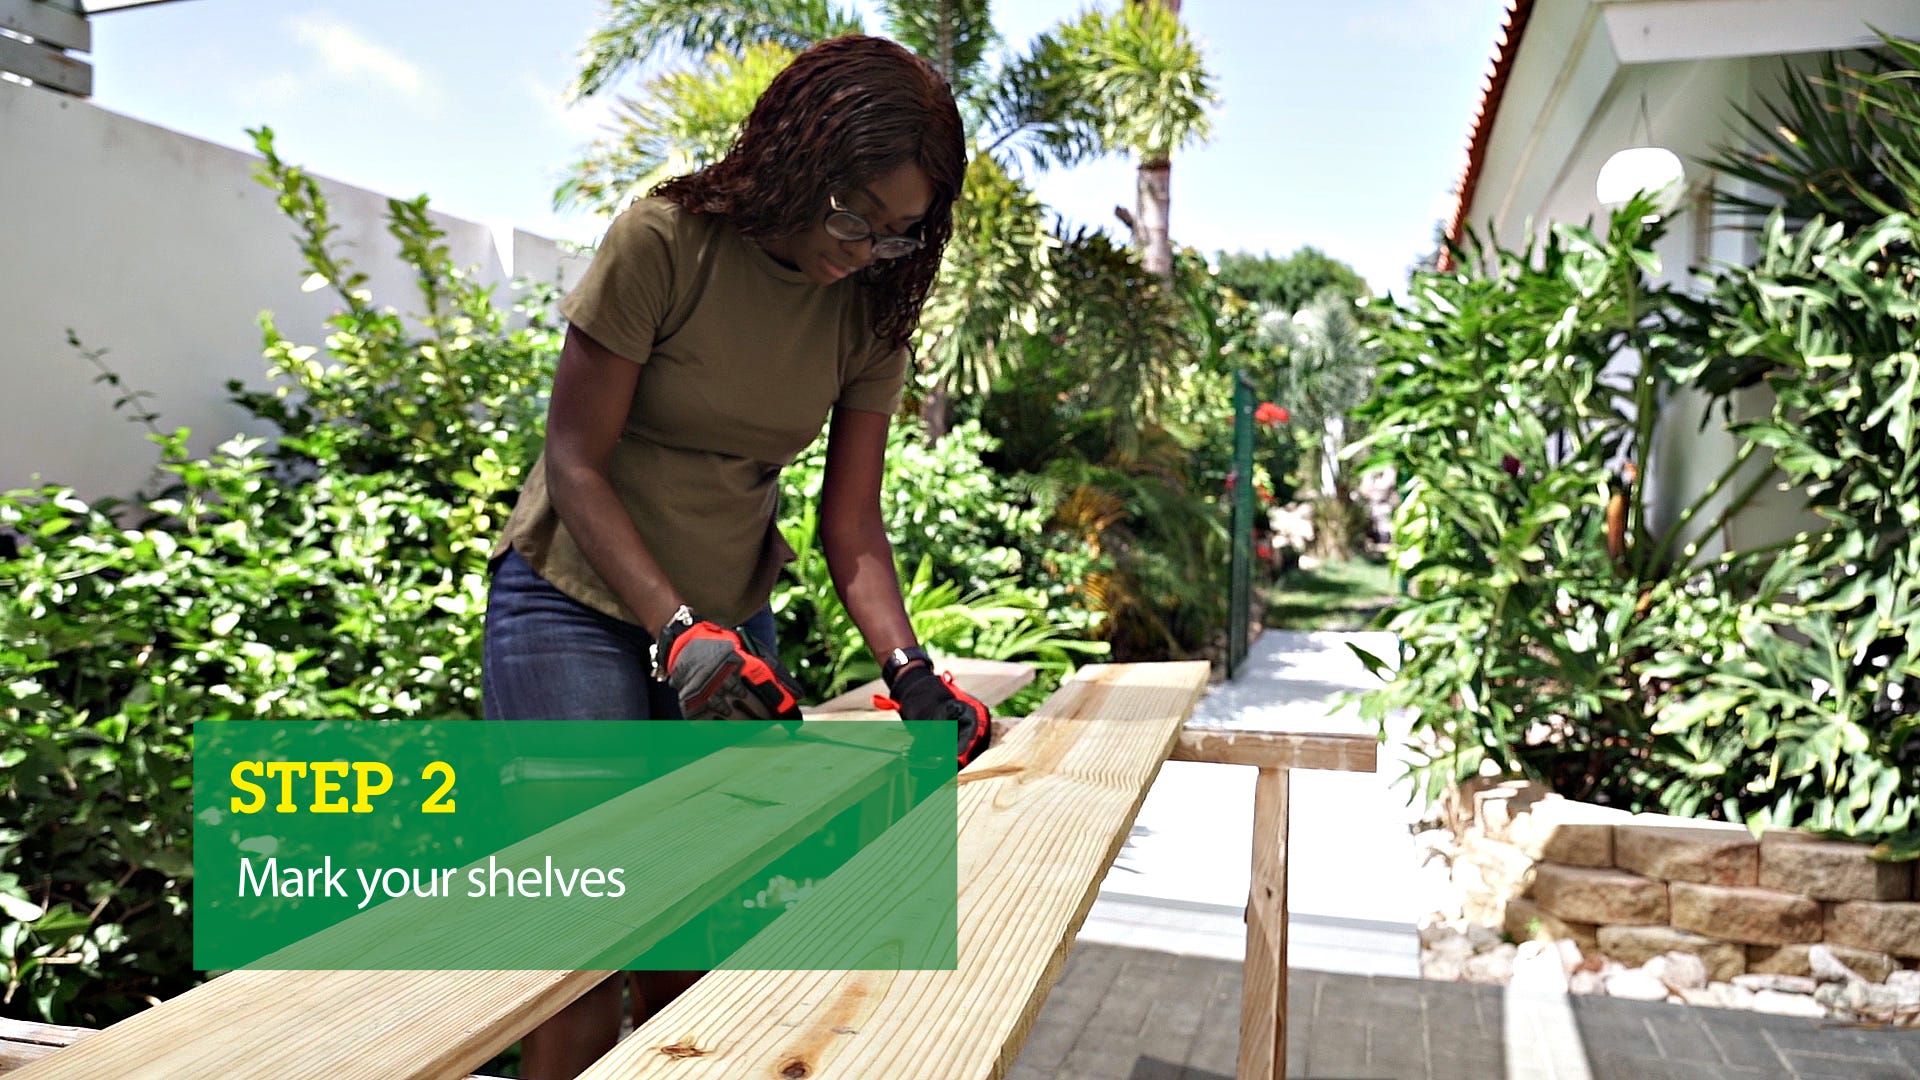
Step 2: Mark your shelves
Now that you have the correct sizes, you can determine where you want the shelves to be. Beware that you use 15 degree lines so that the shelves will end up horizontal. The distance between the shelves can be determined by the amount of space your herbs need.
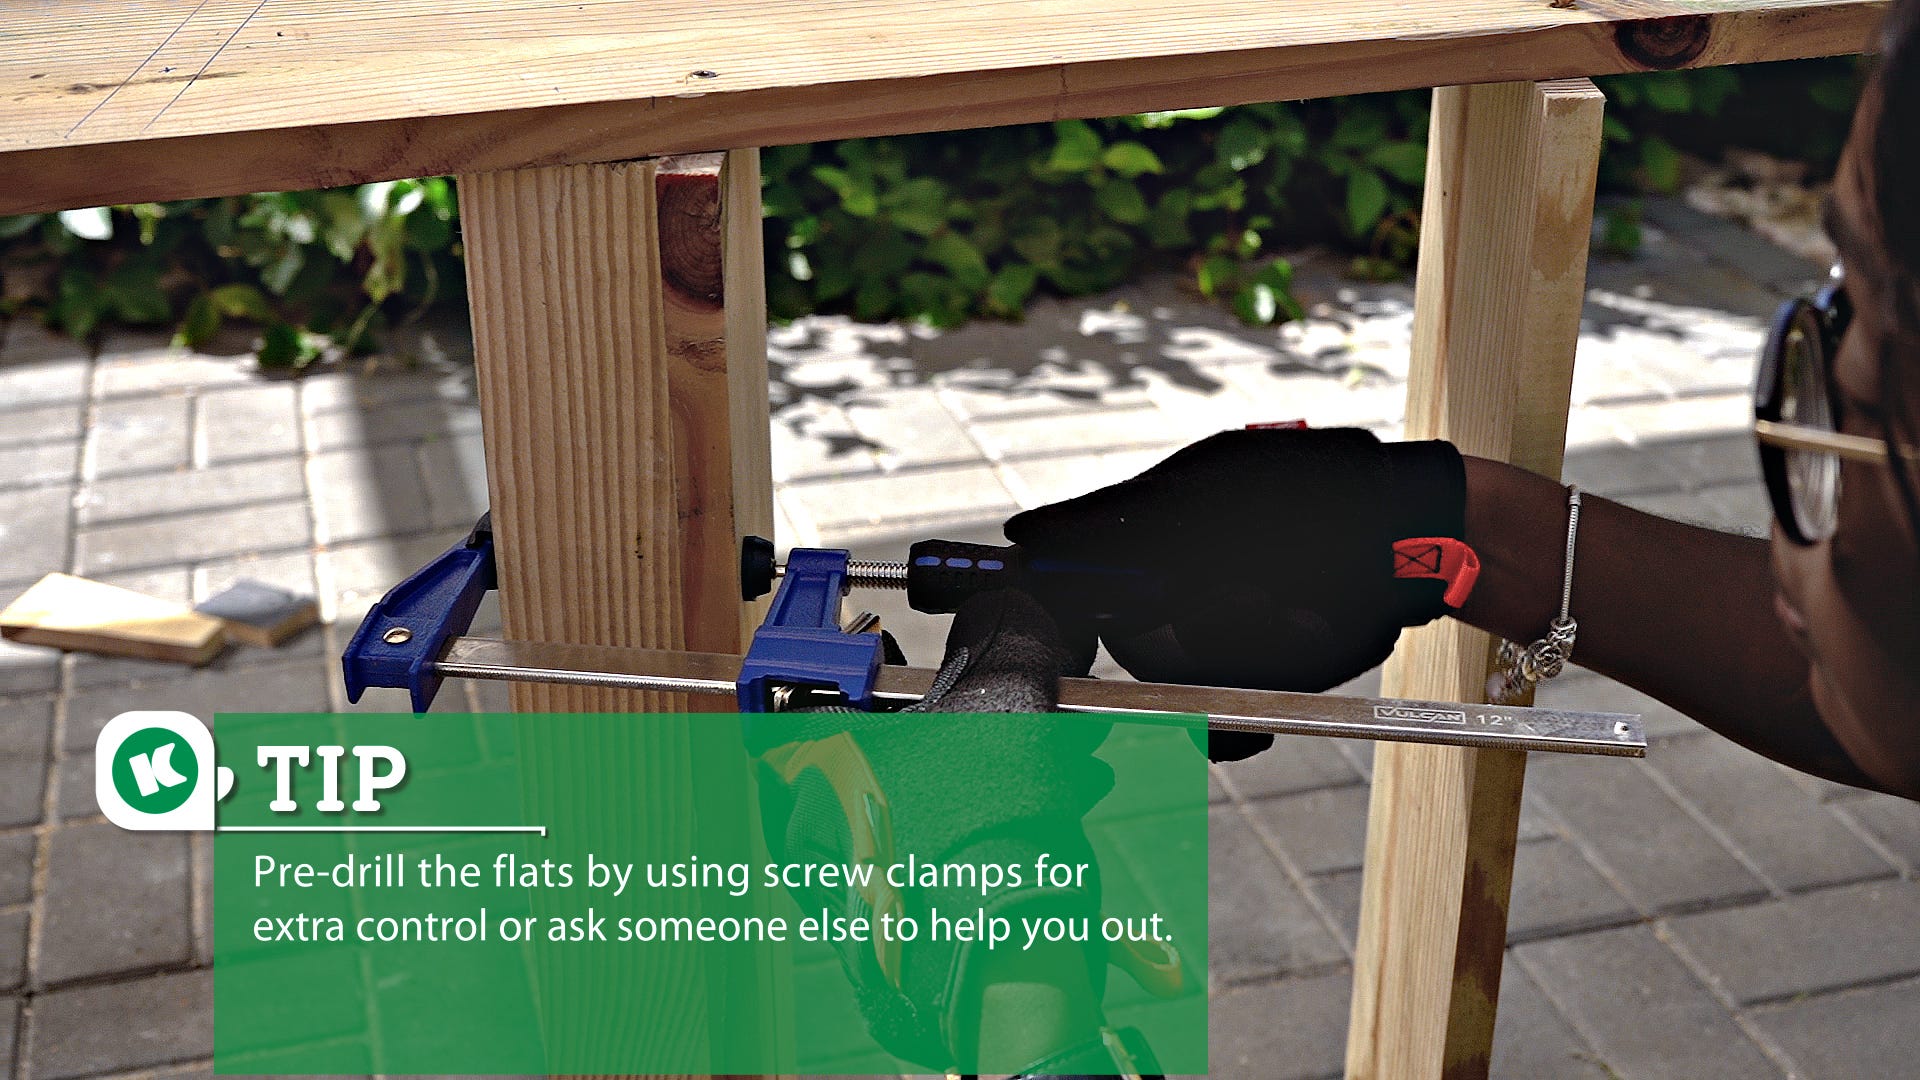
Step 3: Pre-drill the holes
The planks can be pre-drilled at precisely the spot where you want the screws to be at. The plank can be put on its side and another plank can be used as a backplate to get the shelves in the correct position. Pre-drill the holes in the shelves, this will prevent the wood from splitting when you drive in the deck screws.

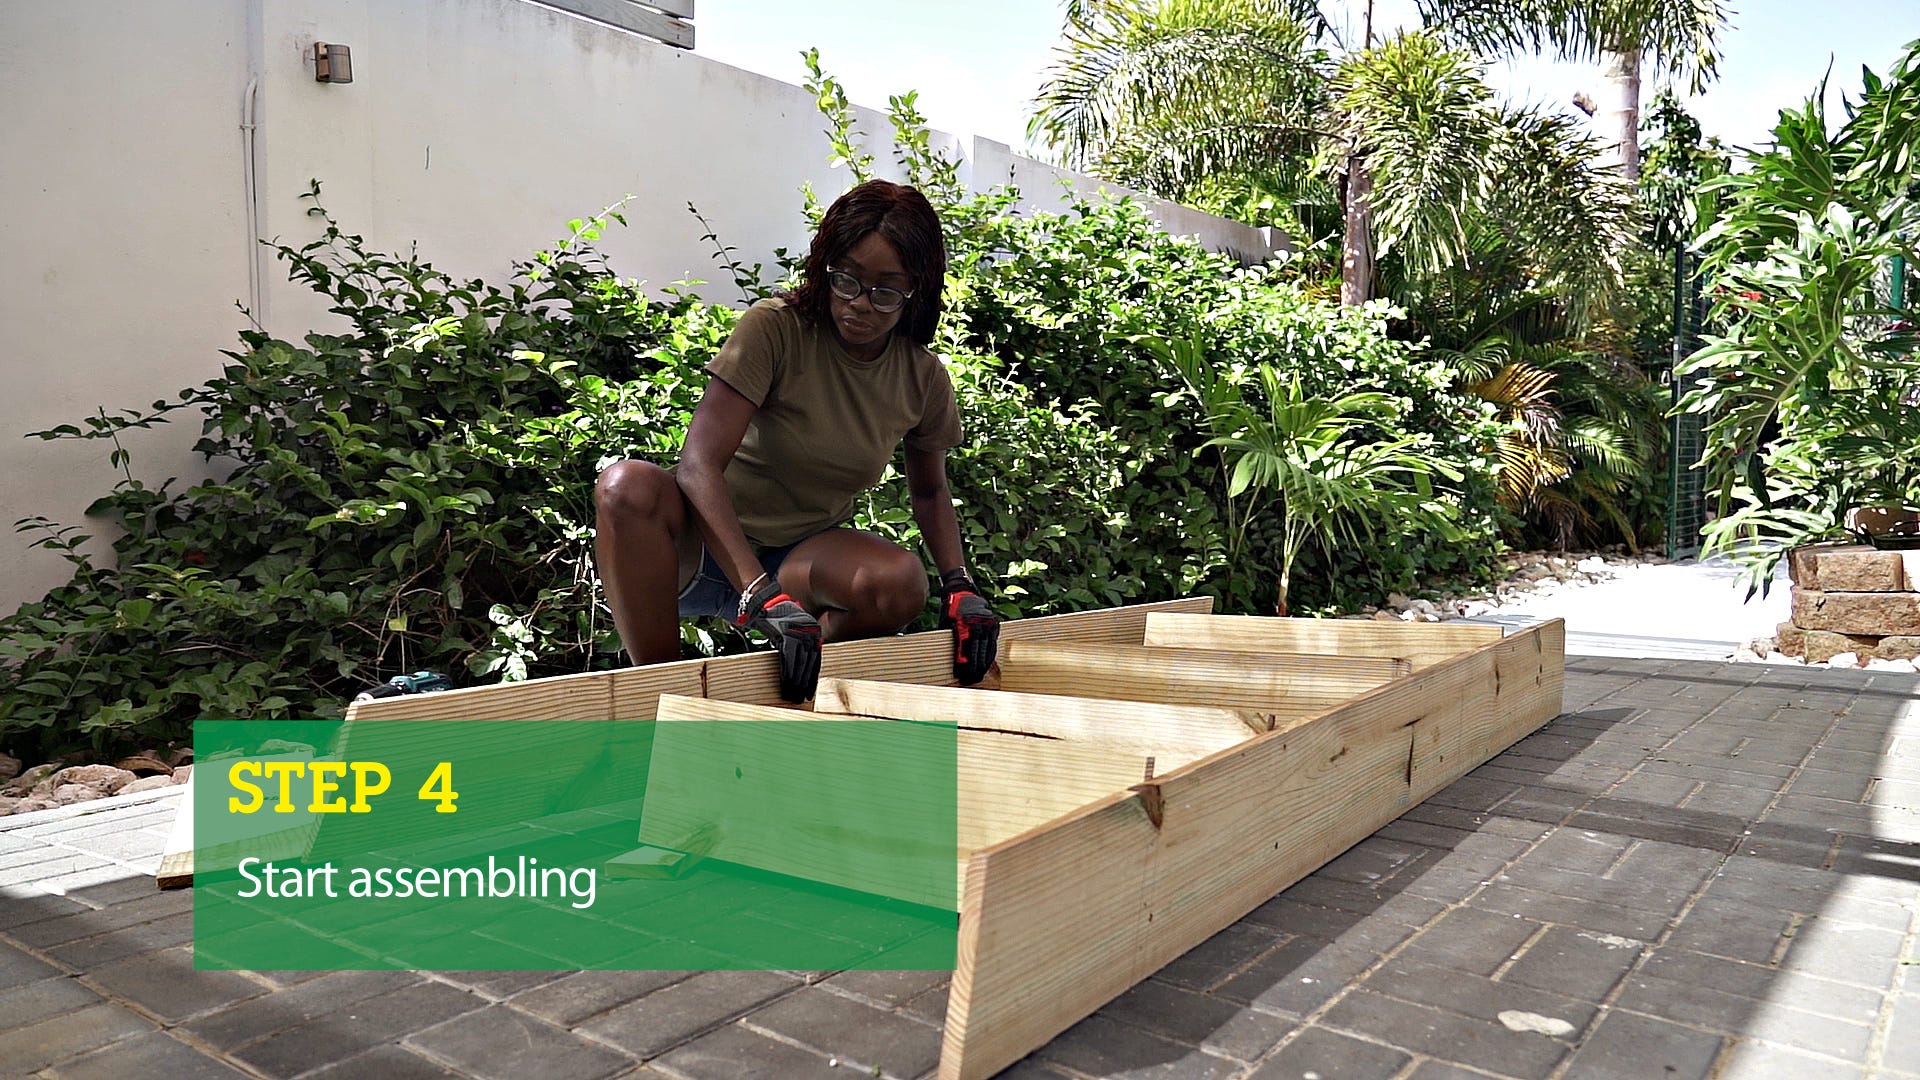
Step 4: Start assembling
Once the holes have been pre-drilled, the screws can be put in place. First ensure that all of the pieces of wood are nicely aligned.
We now have the perfect base for the vertical garden, now we can start putting in the slats.
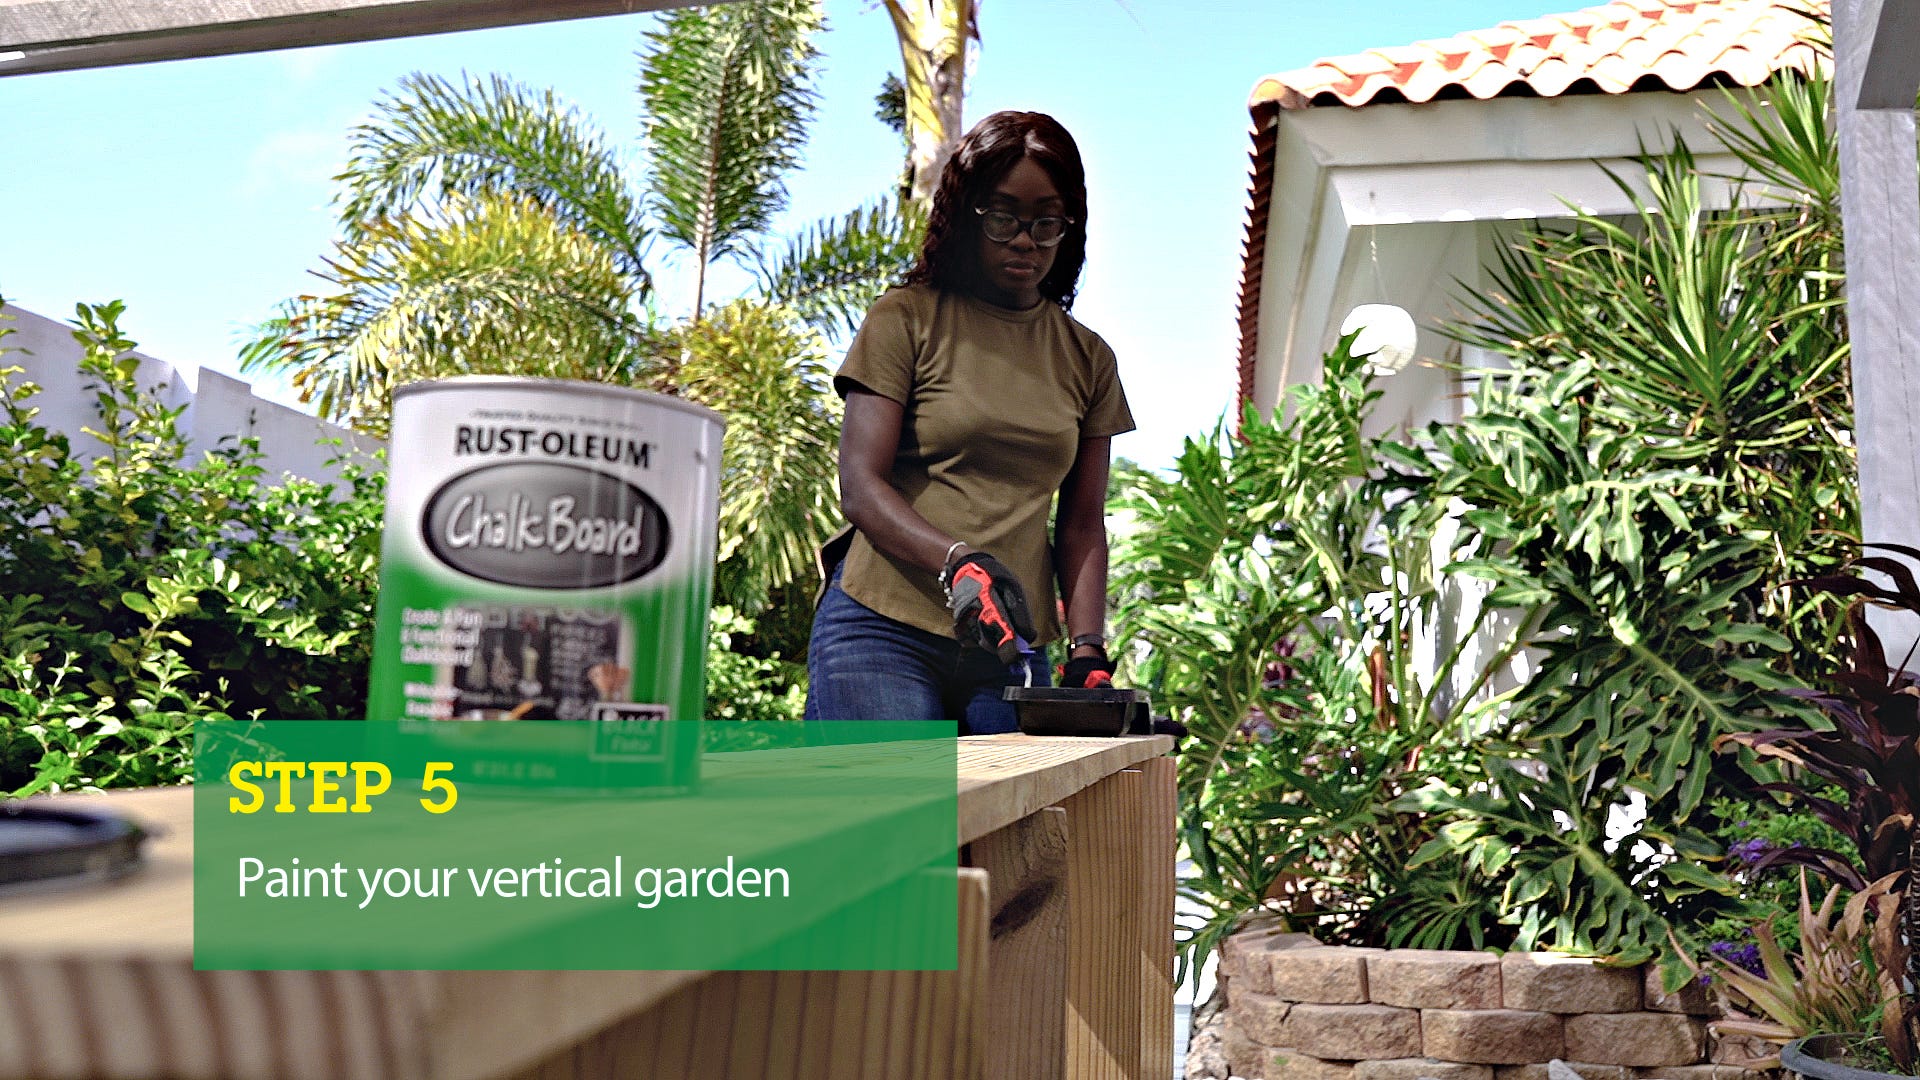
Step 5: Paint your vertical garden
The vertical garden is assembled! We can choose to paint or stain the wood in your desired color. We decided to use chalk paint so that we can write the names of the herbs onto the shelves.
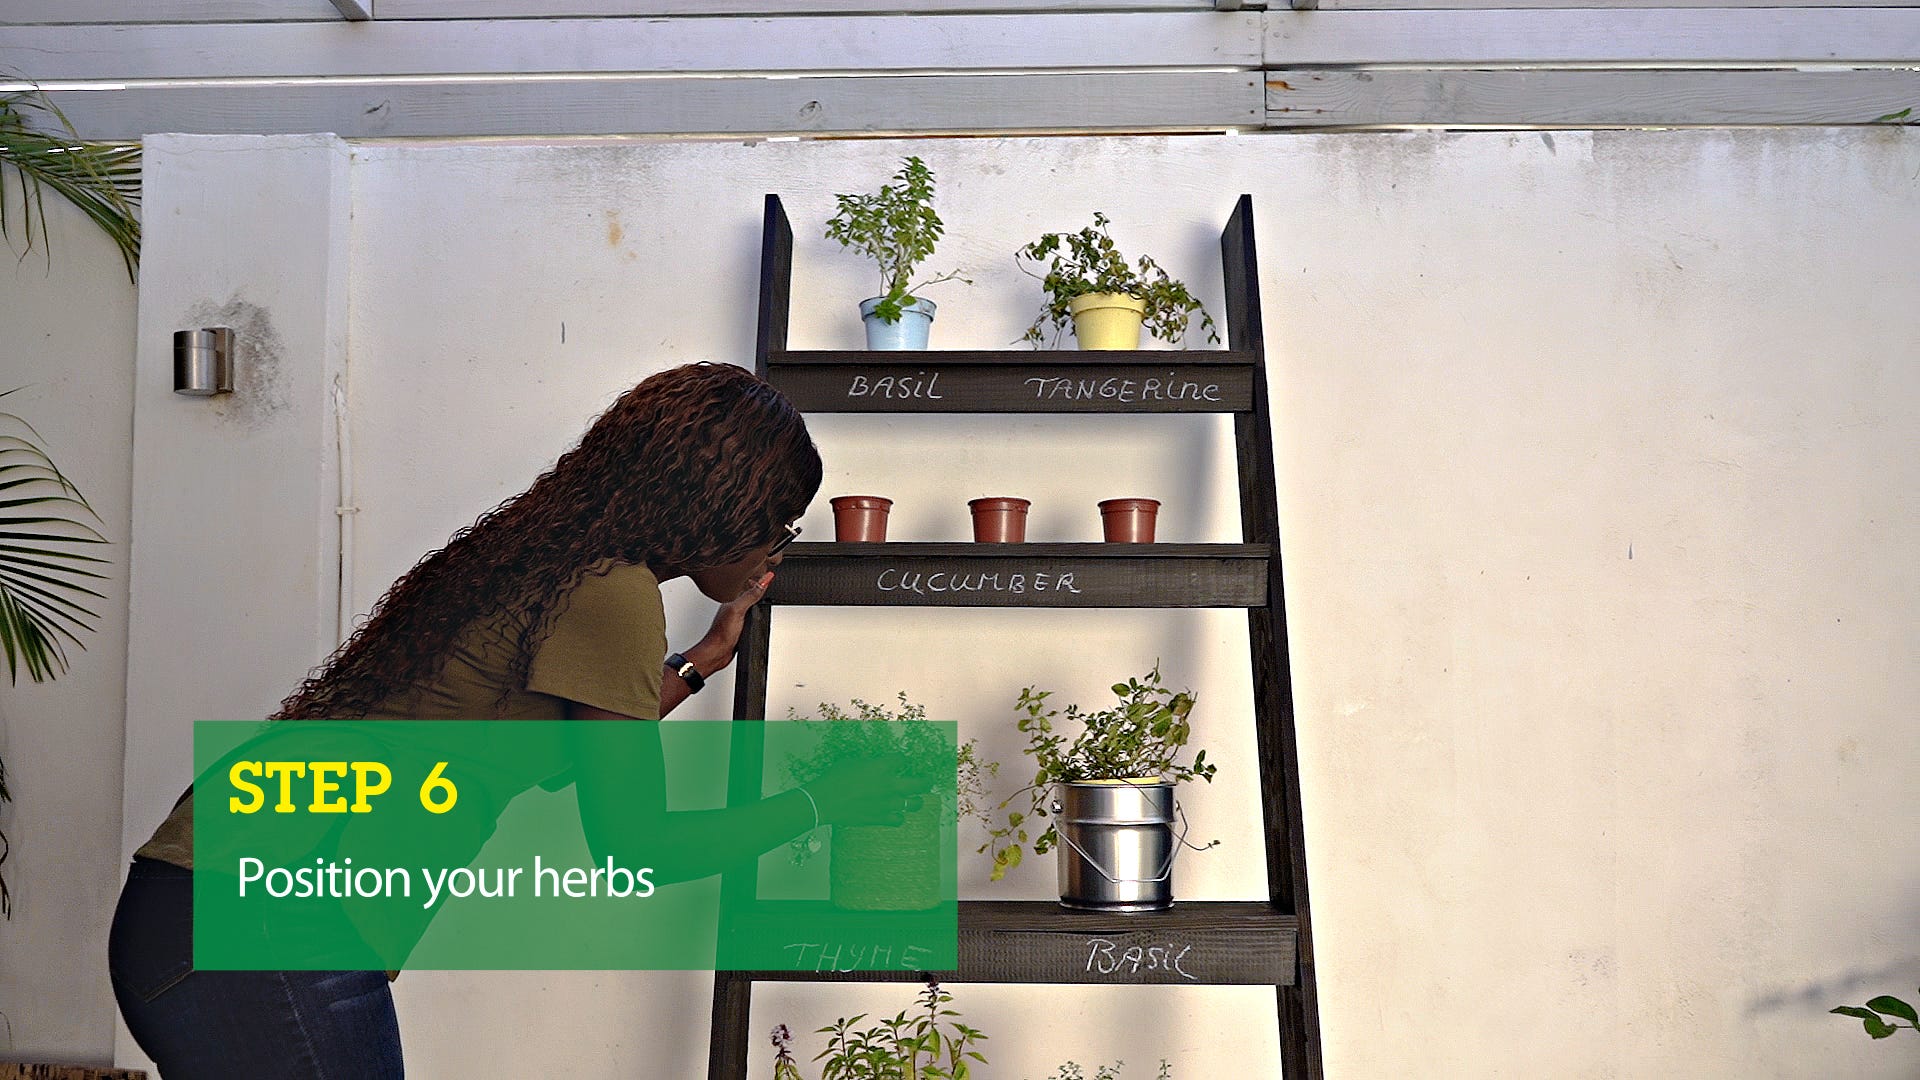
Step 6: Position your herbs
Place your herbs on the steps and voilà, your vertical garden is ready!
Time Needed
2 hours
List of Materials
- 2x 80 inch pieces of wood 1x 8 inch (can also be in one piece)
- 4x 27 inch pieces of wood 1x 8 inch (can also be in one piece)
- 4x 27 inch slats 1x 3 inch (can also be in one piece)
- Deck screws 28 x 2 ¼ or 2 ½
- One shelf per step
- Paint, paint spray or stain
- Paint brush
- Different flower pots
- Herbal plants
- Potting soil or garden soil
List of Tools
- Power drill
- Wood drill bit
- Adjustable square
- Rafter square
- Screw clamp
- Tape measure
- (Electrical) saw
- Pen or pencil
- Safety glasses
- Gloves
- Mouth cap