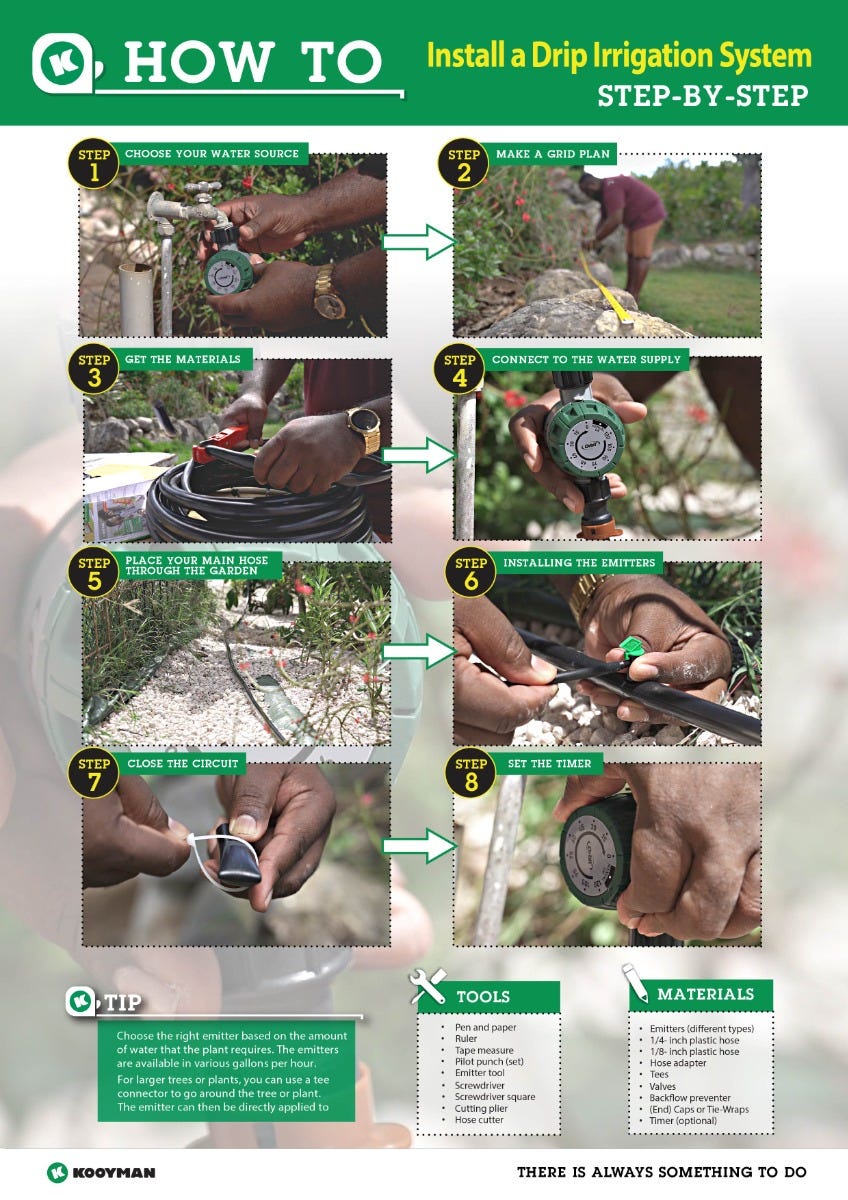
For the plants in your garden to grow and bloom they need a consistent flow of water. We are here to help you shape your garden in a better, more efficient way. By installing a drip irrigation system you’ll ensure that your plants are watered evenly and regularly, without the hassle of constantly looking after them.
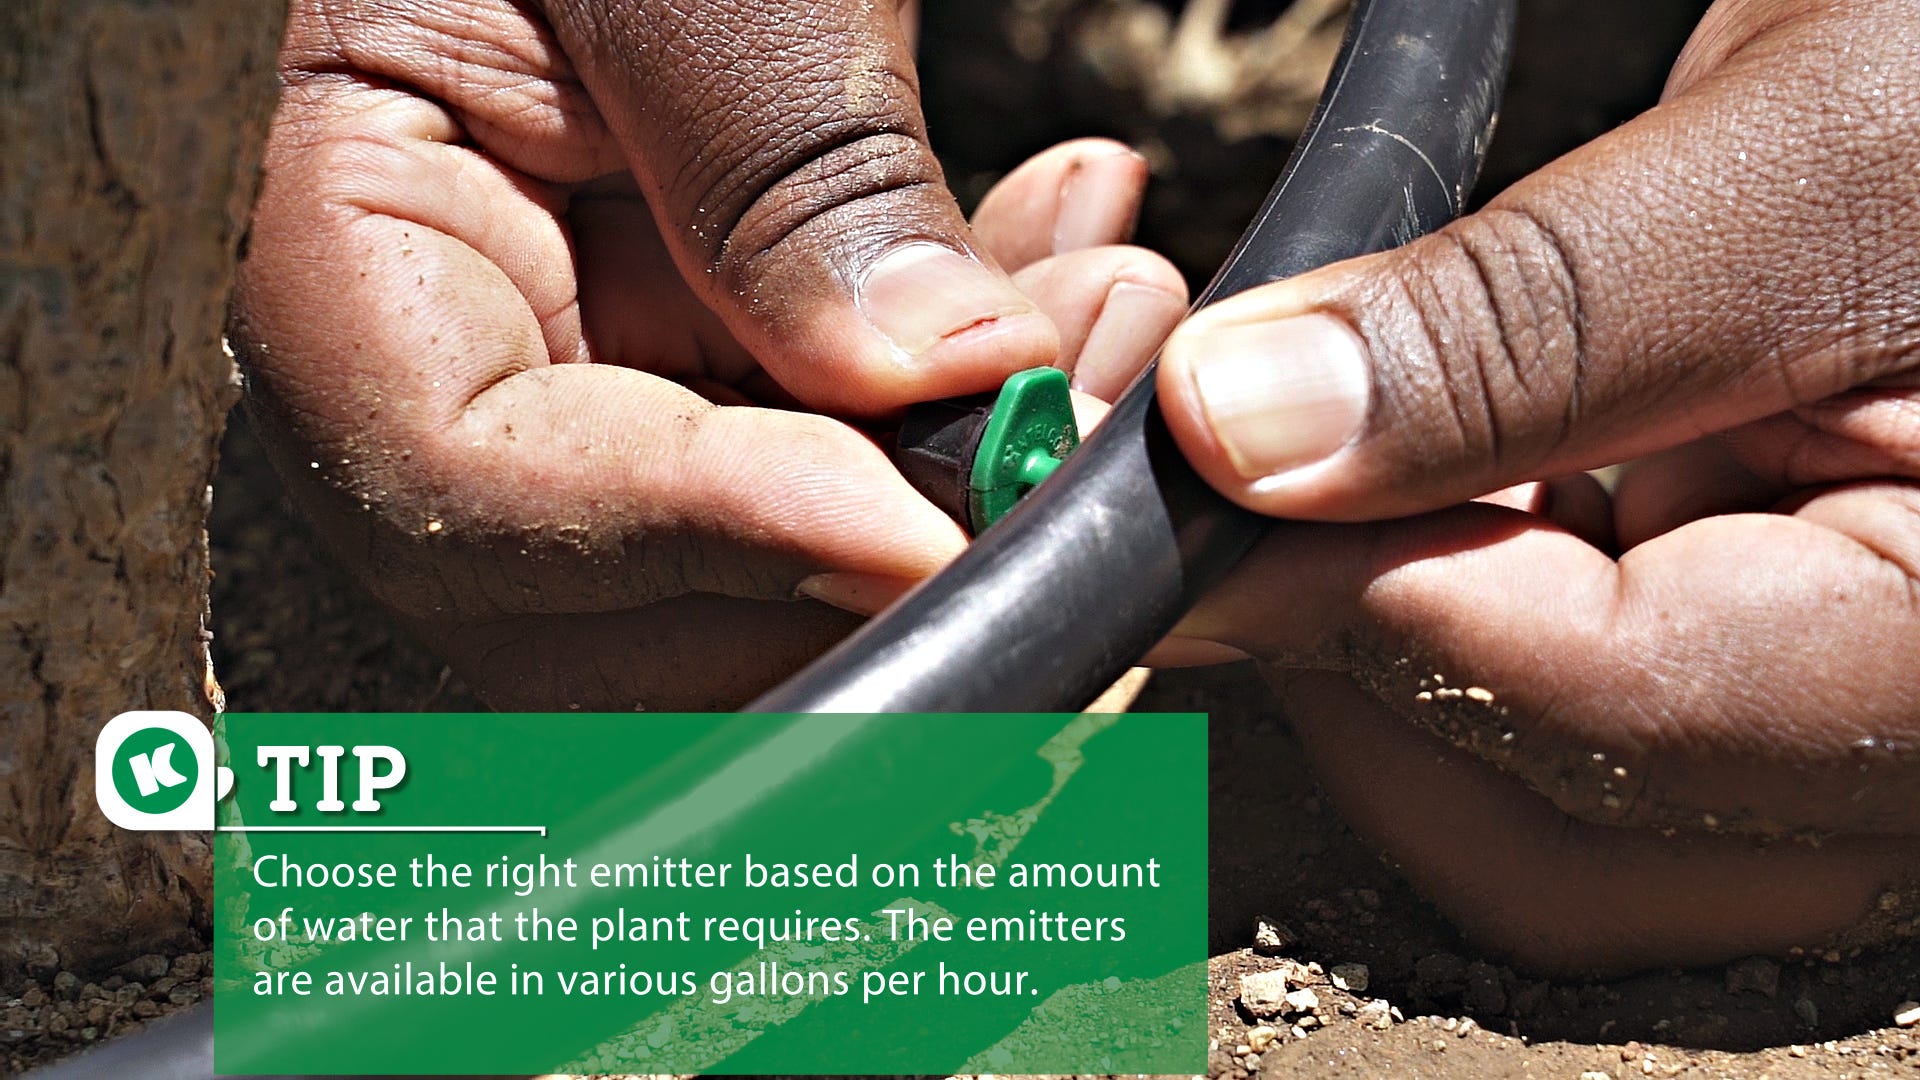
A drip irrigation consists of various parts such as emitters, hoses and valves. The emitter ensures a constant water supply to the plant. It is important that the parts are correctly connected to each other, make a grid plan for this. Determine which plants need to be connected to the irrigation and where the hoses should go. This way you will immediately know the length of the hoses. Emitters are spaced every 12 inches apart.
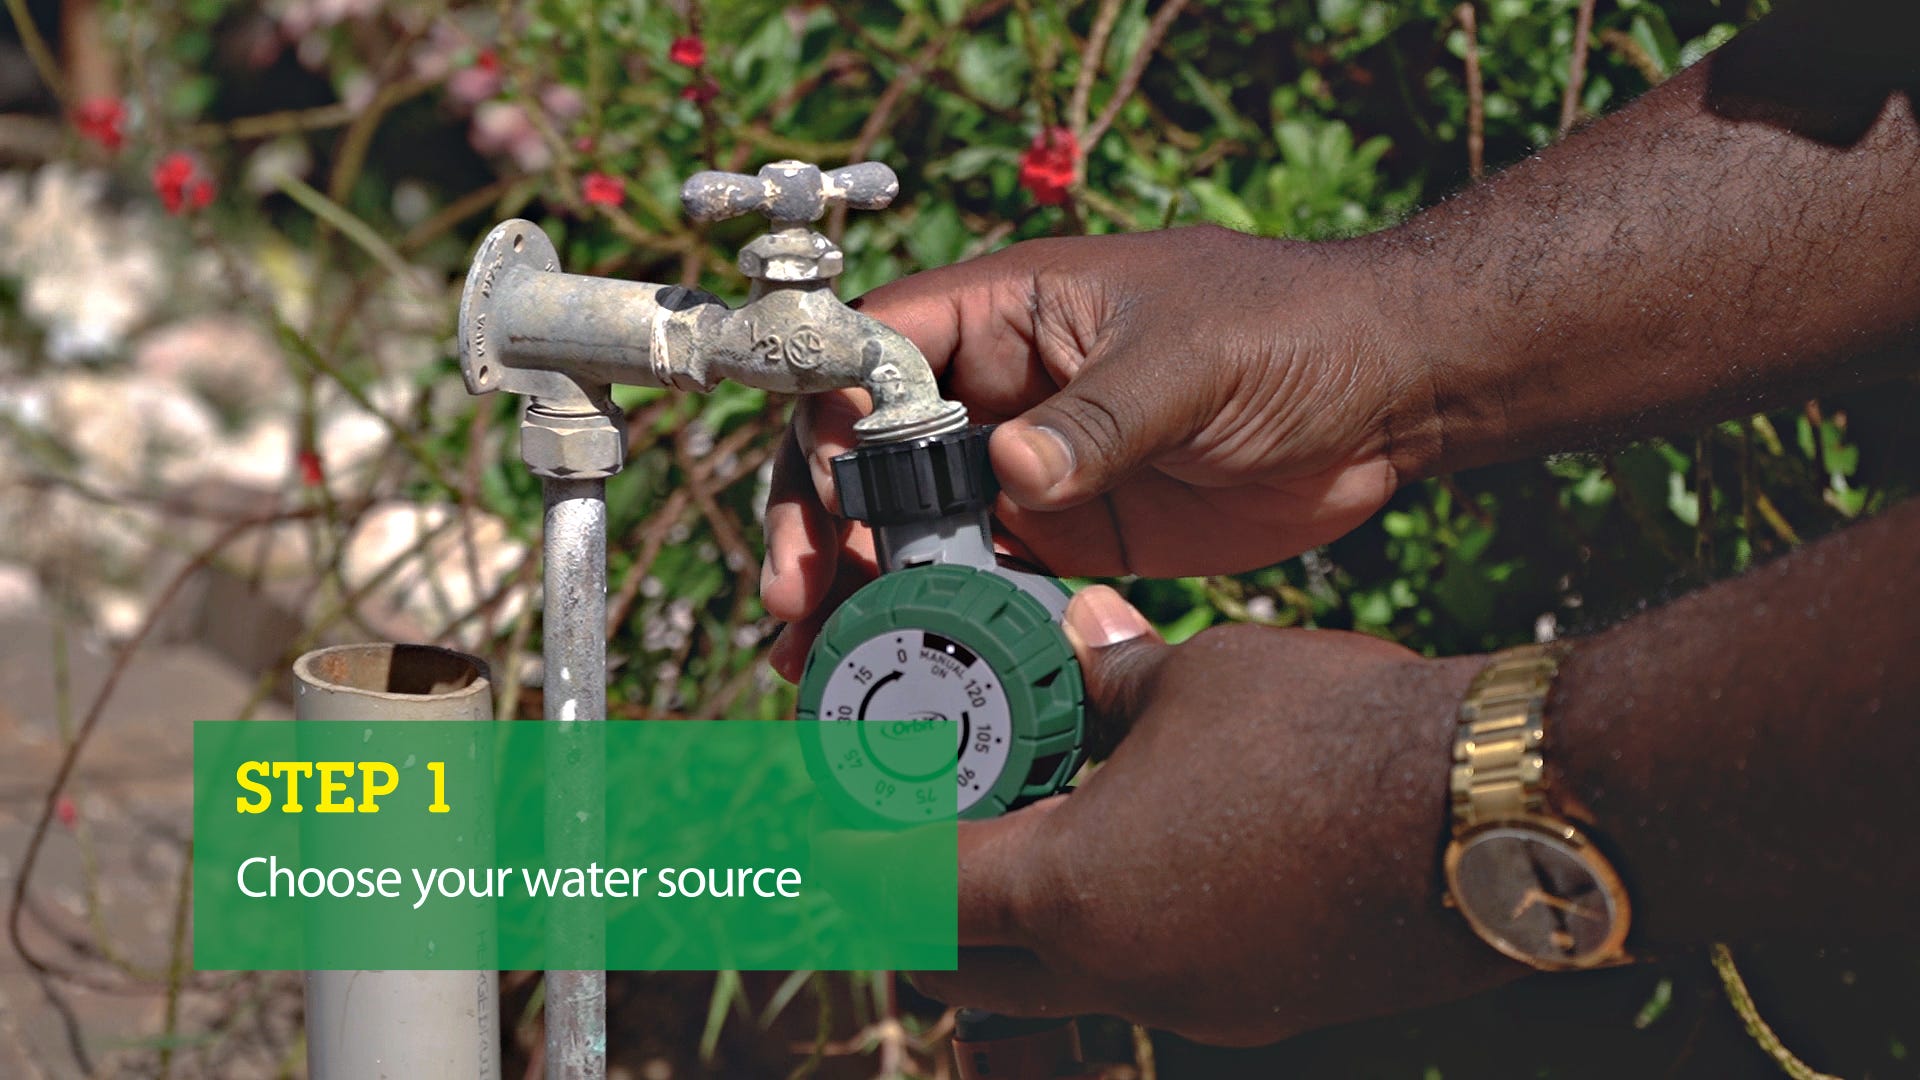
Step 1: Choose your water source
First of all, it is important to know the different options of water supply. You can attach your drip irrigation system to a deepwell, if you have one, or on the domestic water tap. We have decided to attach it to the domestic water tap.
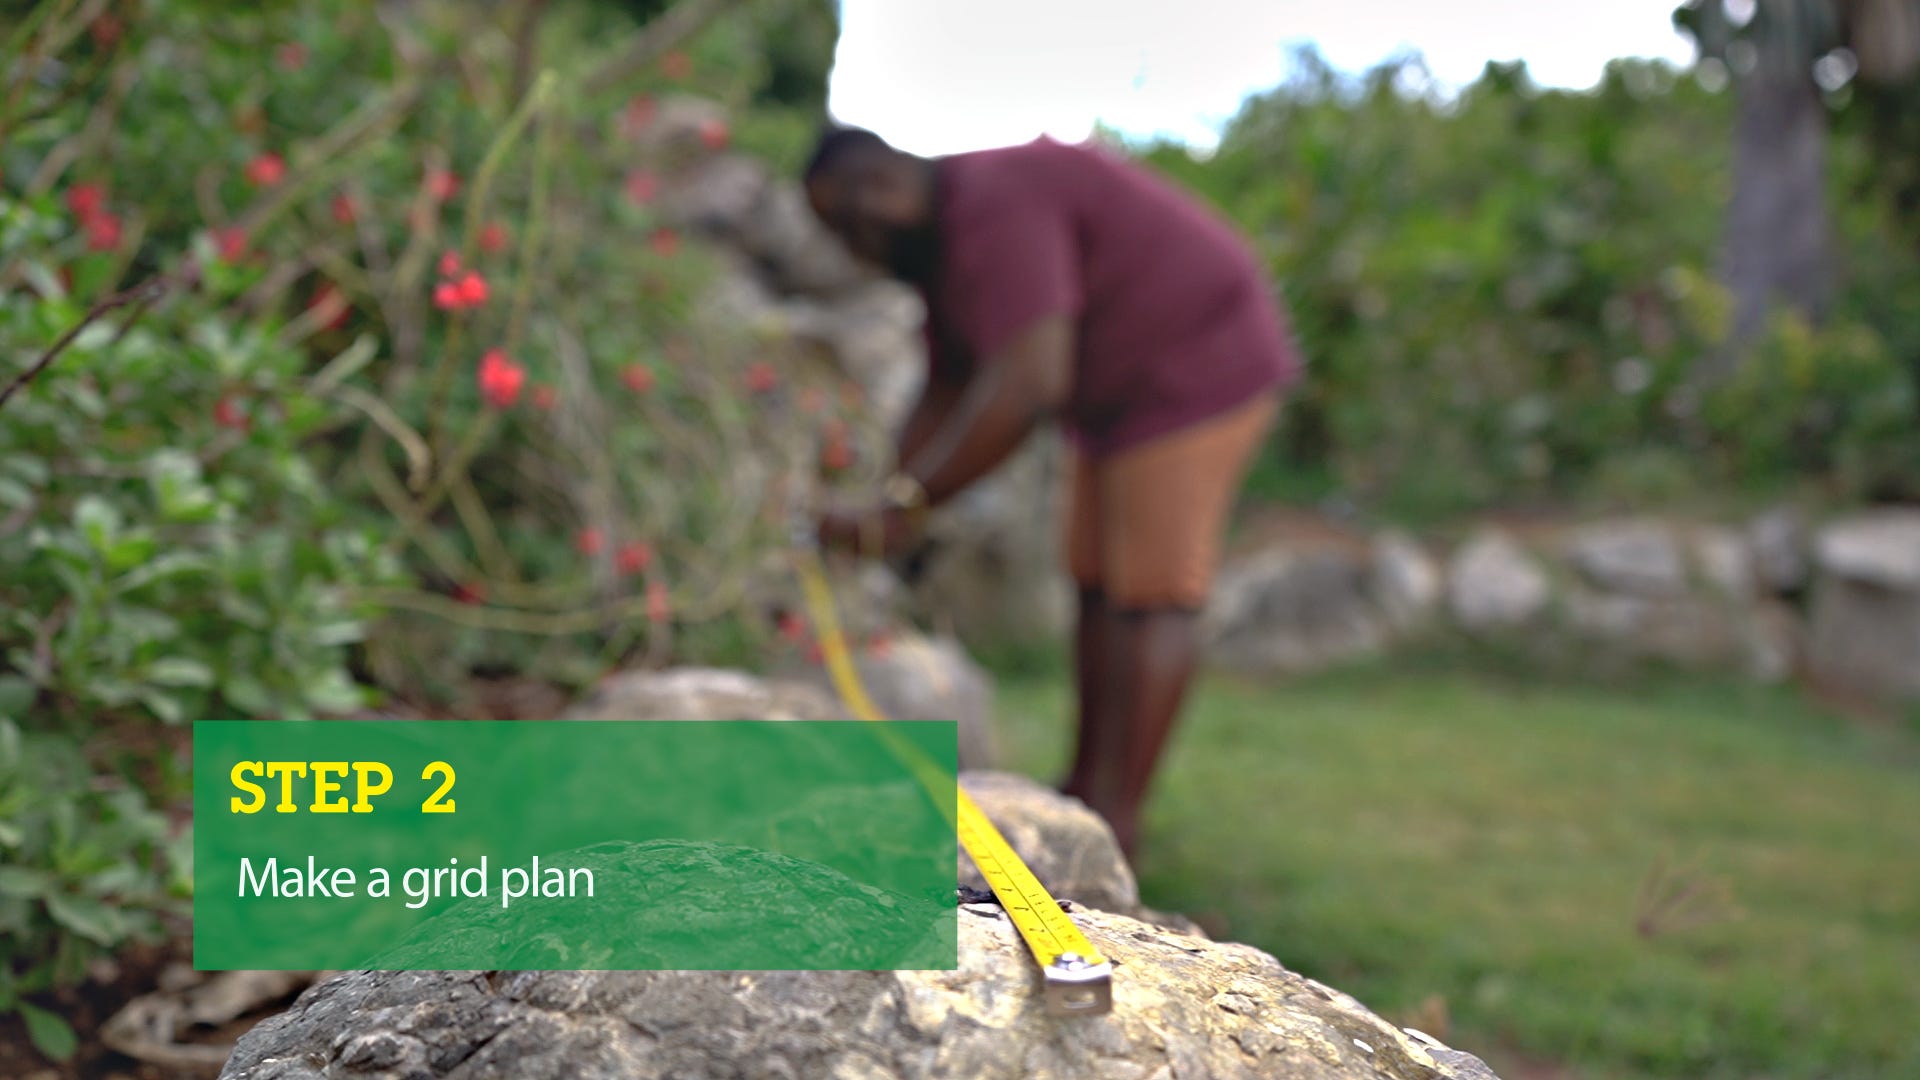
Step 2: Make a grid plan
Determine where the drip irrigation system needs to be installed. Measure the area and the length of the hoses you need. Drawing a grid plan will help you to keep an overview, this is also easy to count the emitters you need for your garden.
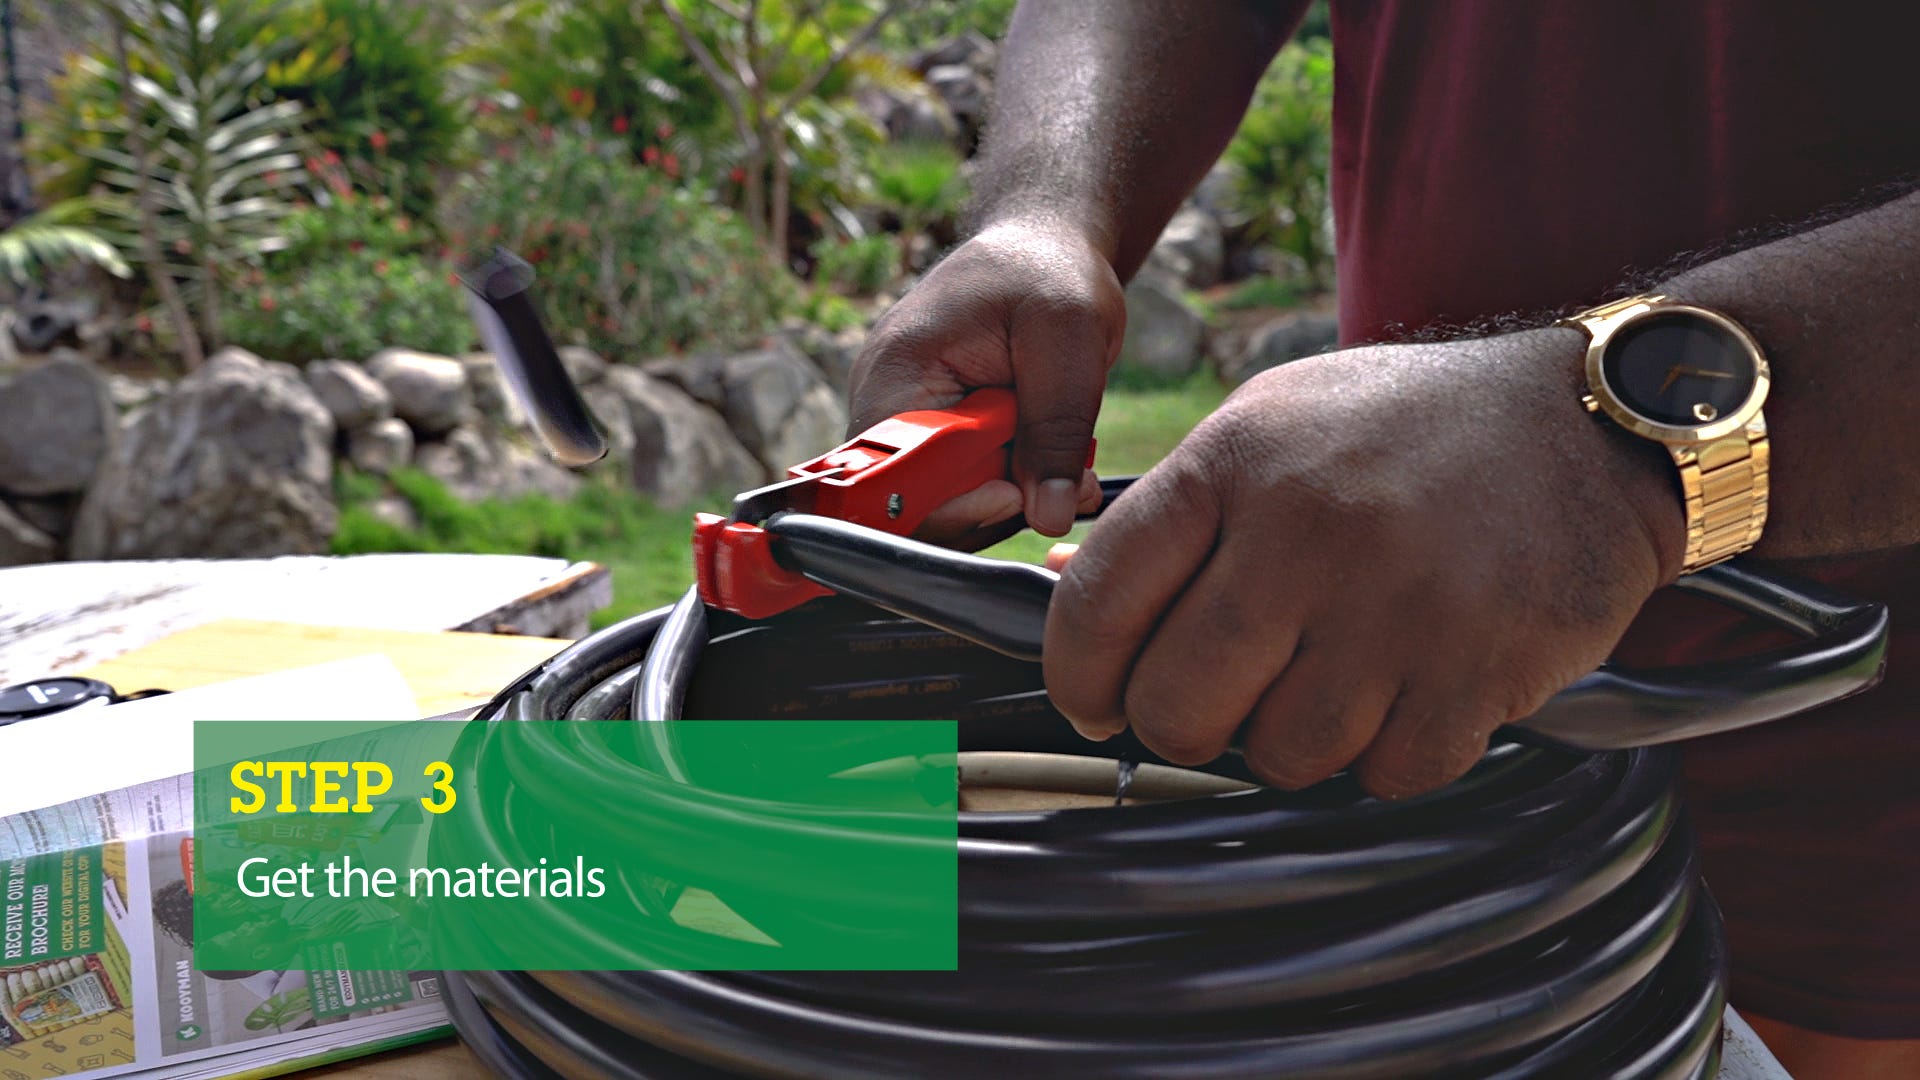
Step 3: Get the materials
Once you have measured everything, you can buy your main hose, splitter, right amount of emitters and other supplies corresponding with what your garden needs.
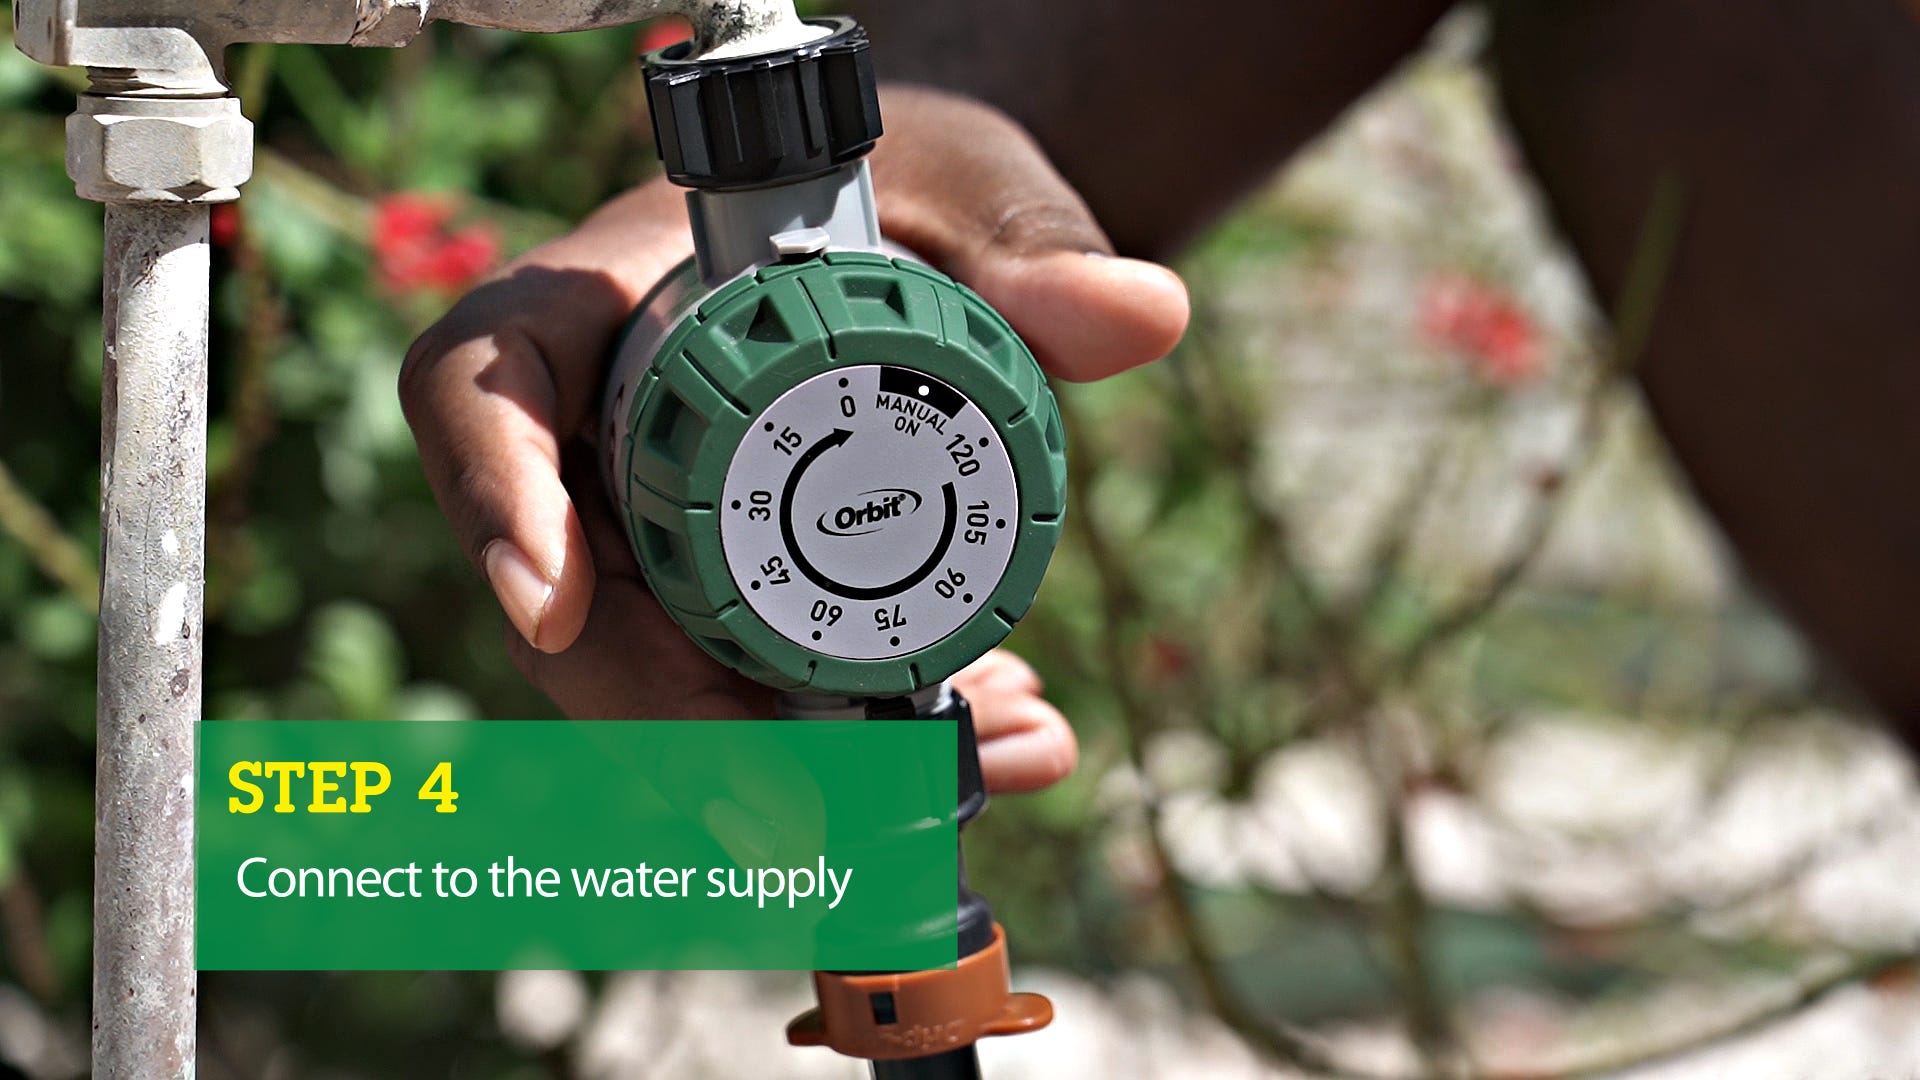
Step 4: Connect to the water supply
It is extremely helpful to install a timer to the main water supply. If you ever forget to close the water tap, the water will stop flowing automatically. We have also installed extra security underneath the timer. Once you have finished this, connect the main hose by pushing it into the connecting part.
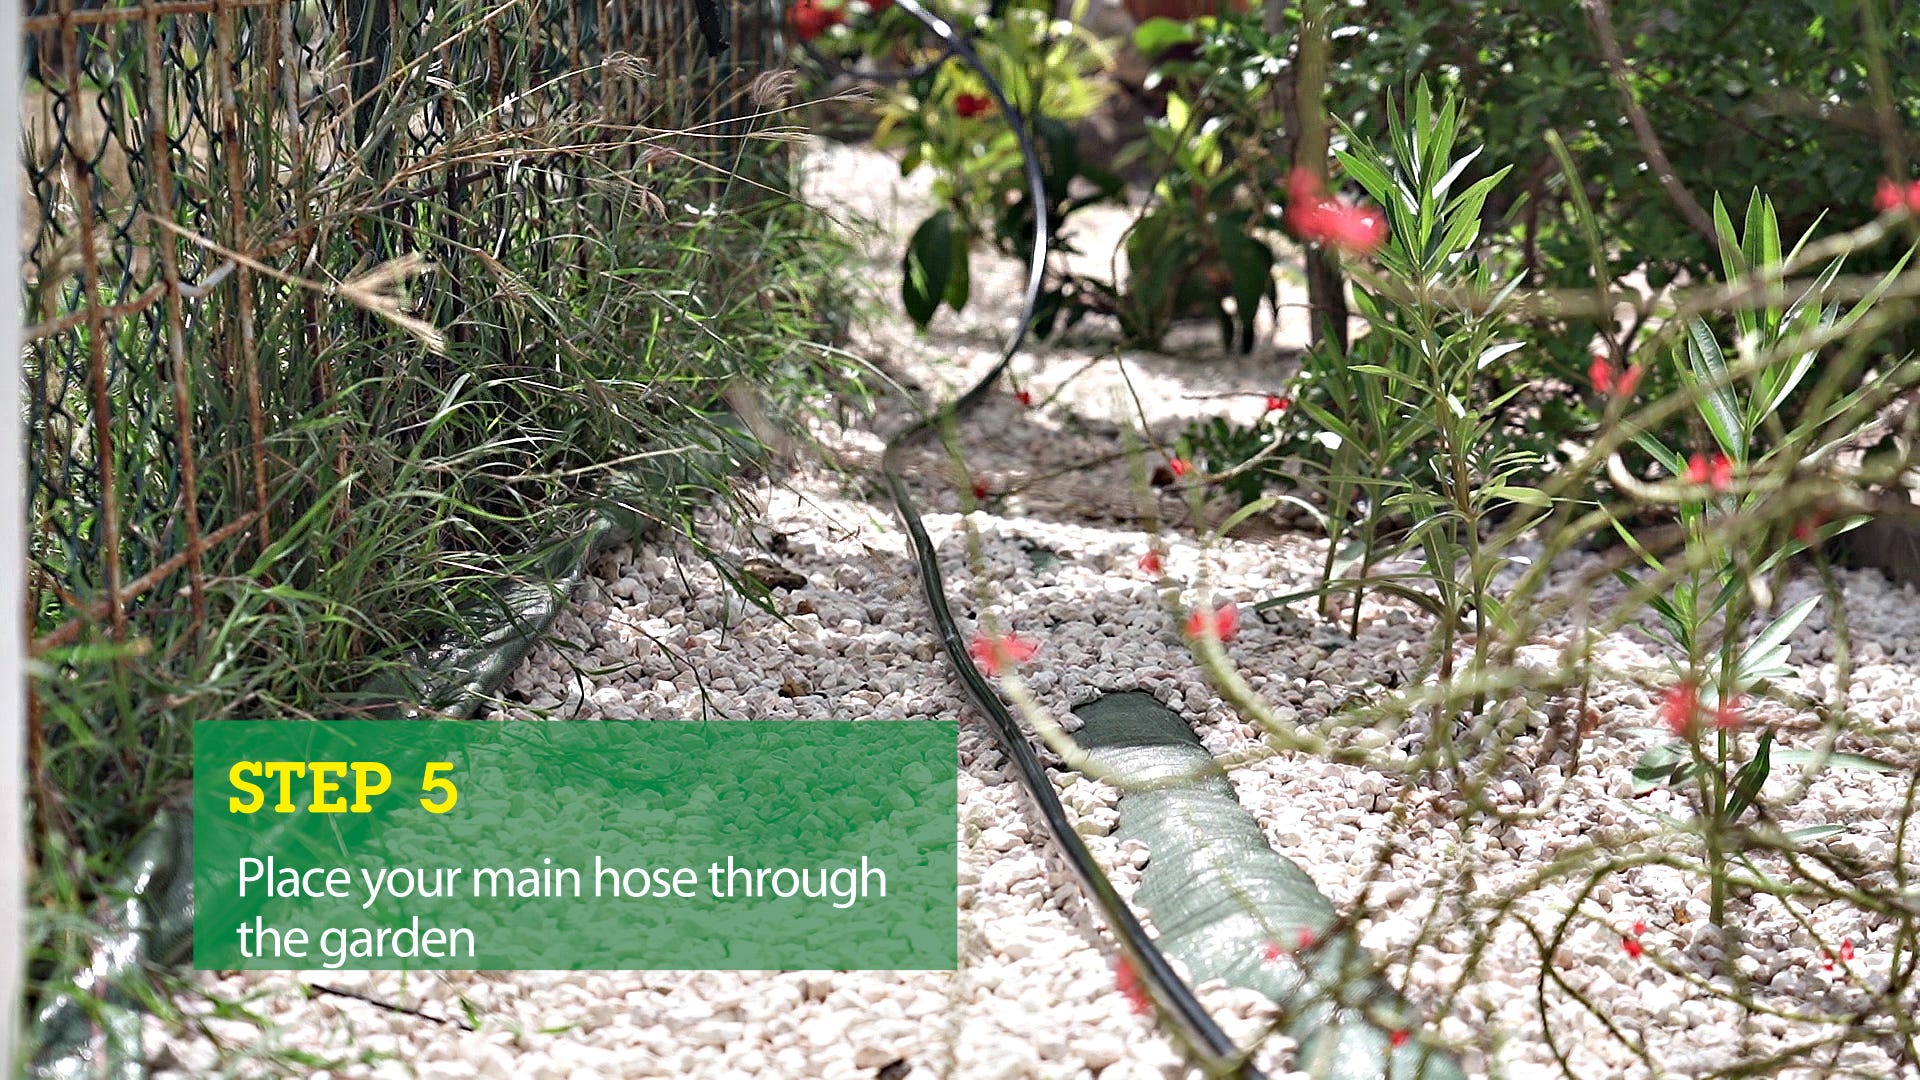
Step 5: Place your main hose through the garden
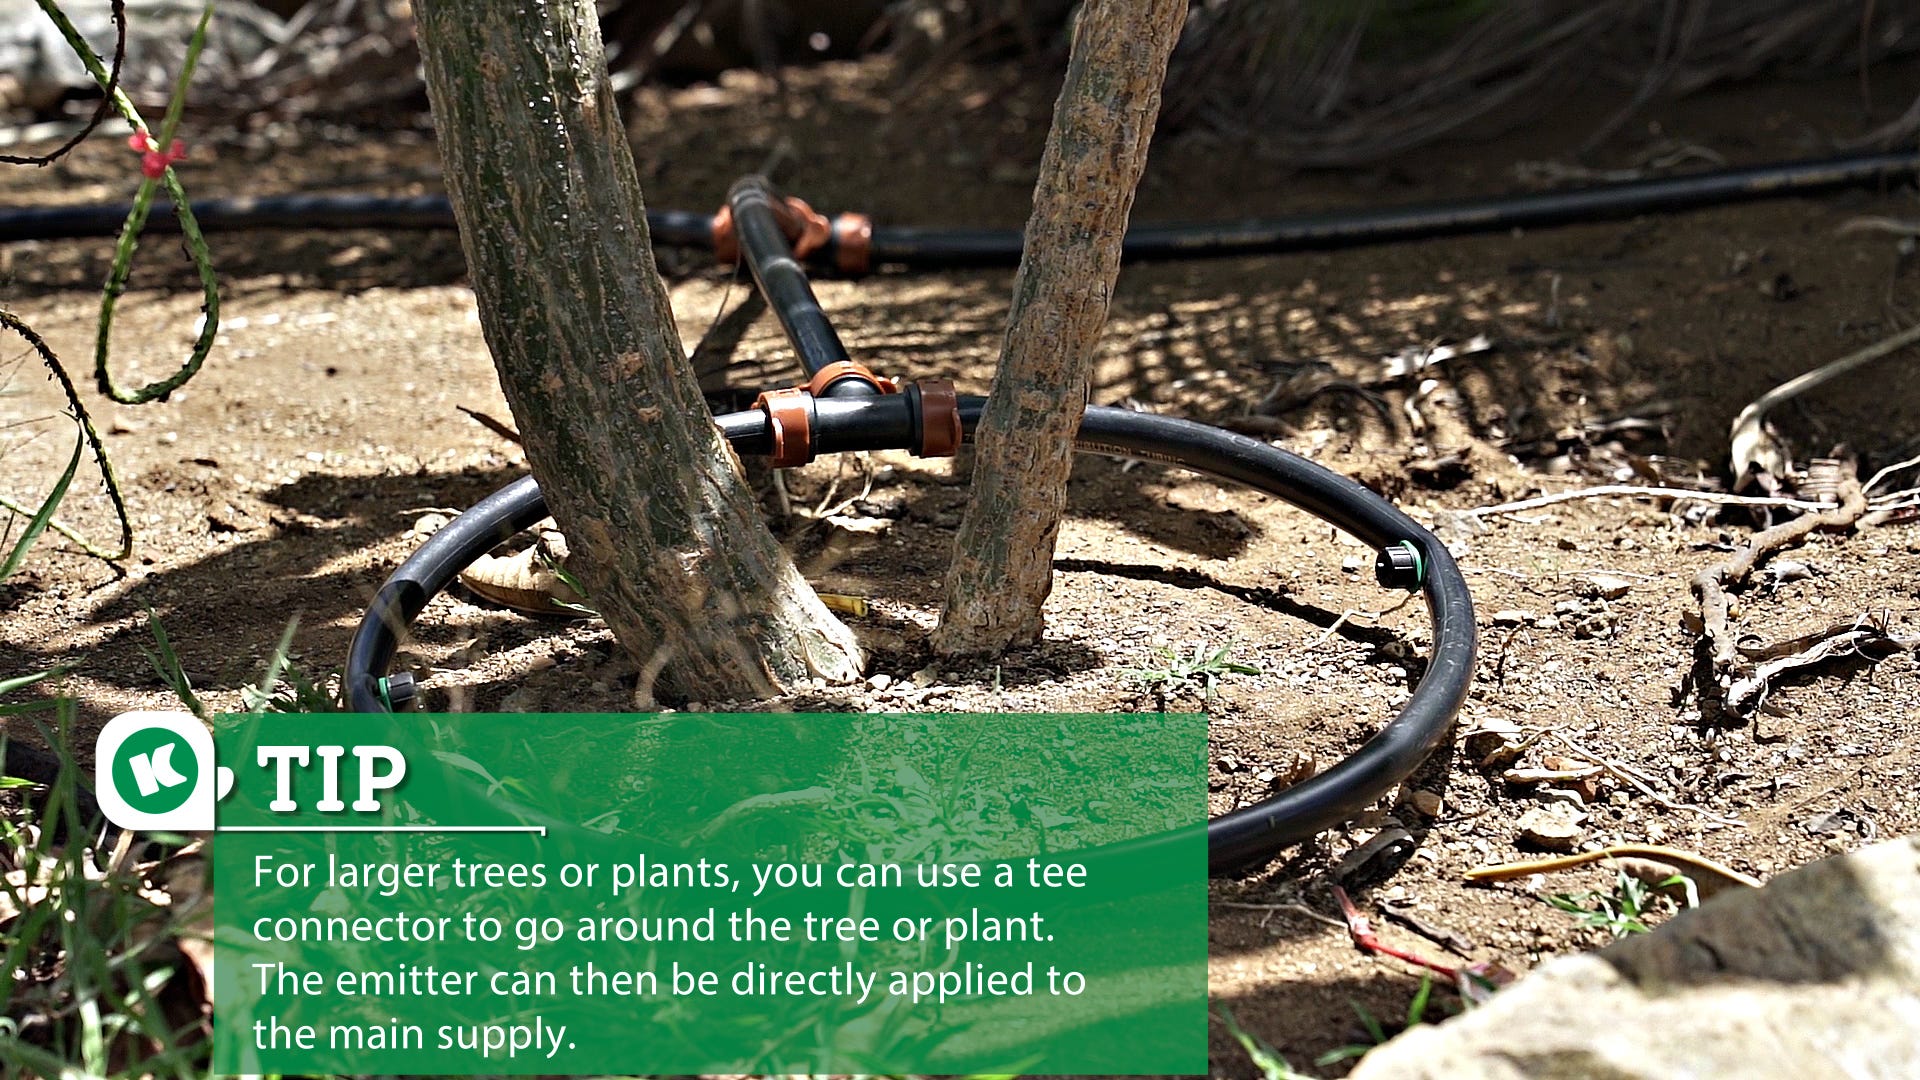
You can now start with placing the main hose through the garden. If necessary, you can install a tee connecter. The tees connect the hoses together and allow for the pipes to branch, cut the main hose to the desired length.
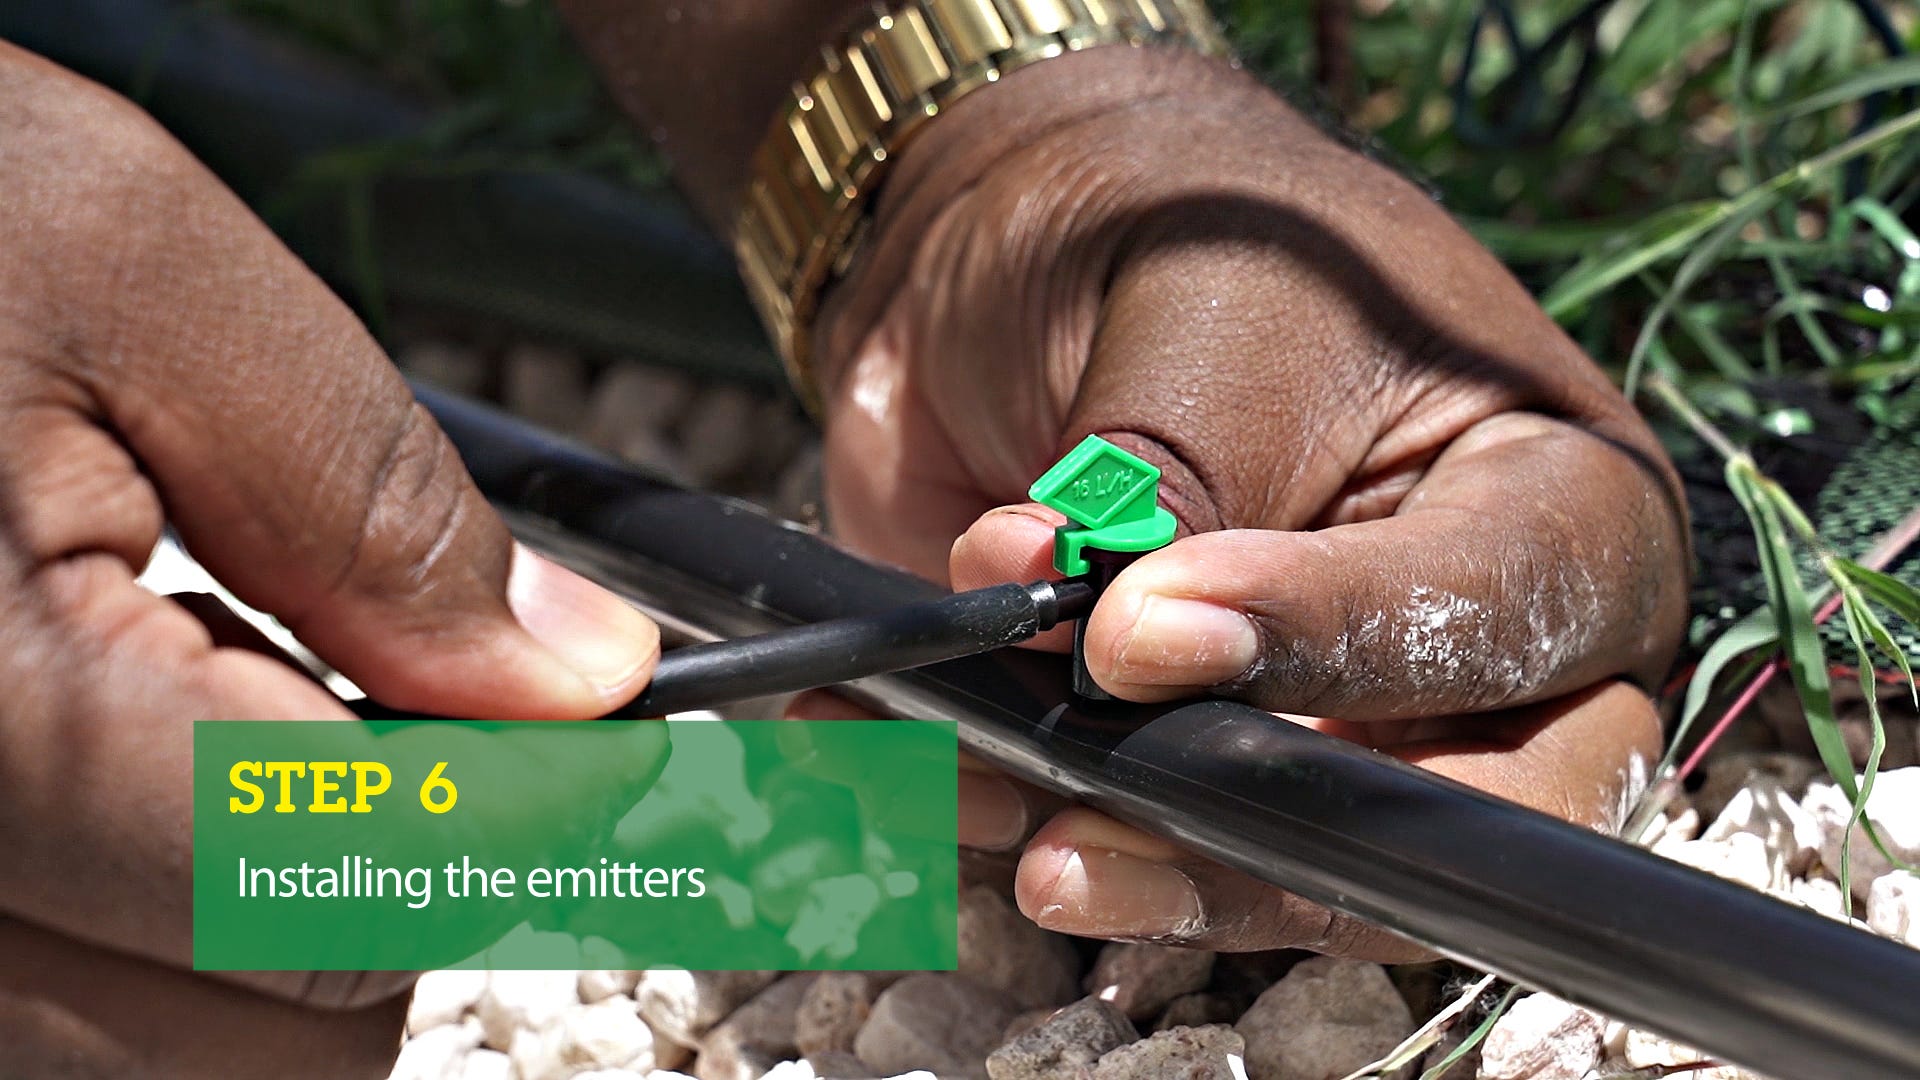
Step 6: Install the emitters
The next step is to install the emitters. Poke holes in the pipe with the emitter tool at strategic points near vegetation. The emitters can be put into the main hose, this will only be successful if the main hose is close to the plants.
If the distance is too large from the main hose, you can use a 1/8-inch pipe to direct the water to the plants. These can be secured in the ground near the plants.
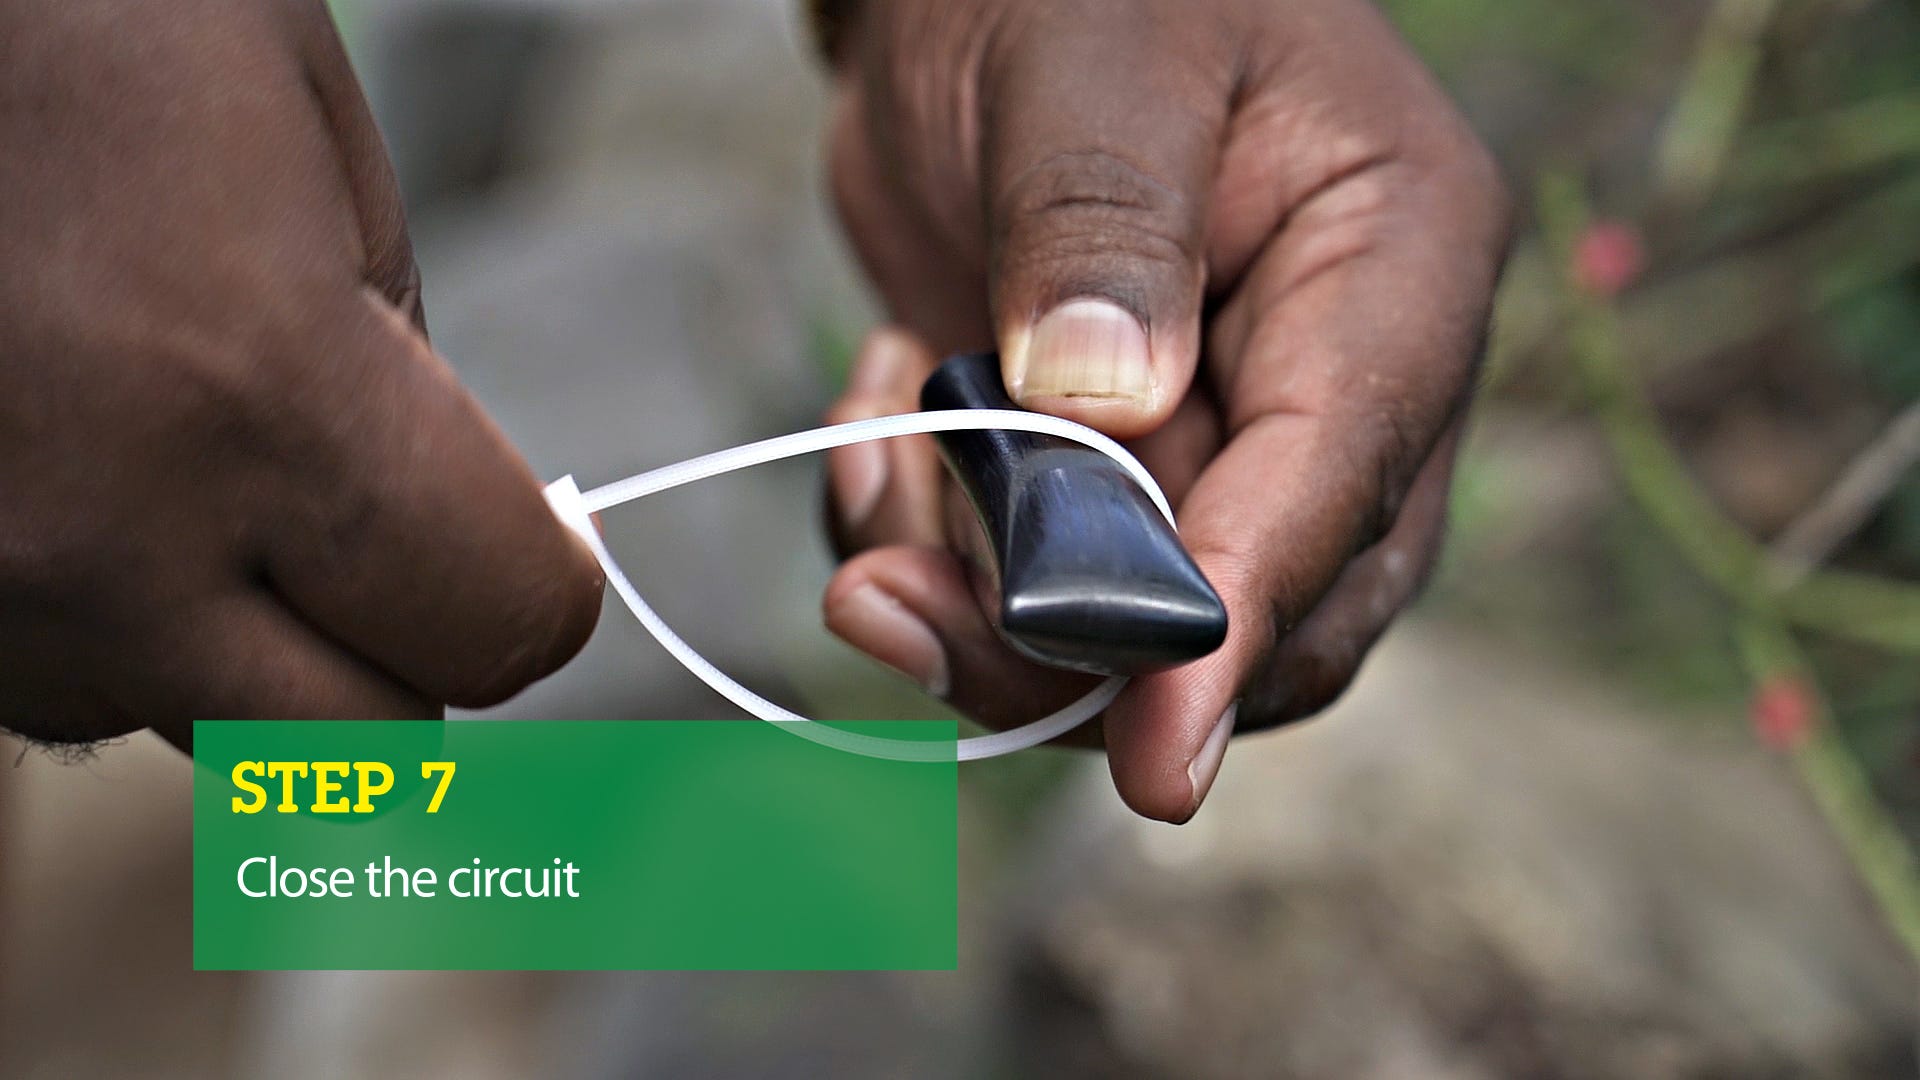
Step 7: Close the circuit
In order to ensure that the system works, the end should be closed. You can buy endcaps for this or you can fold in over the pipe and apply a tie-rap.
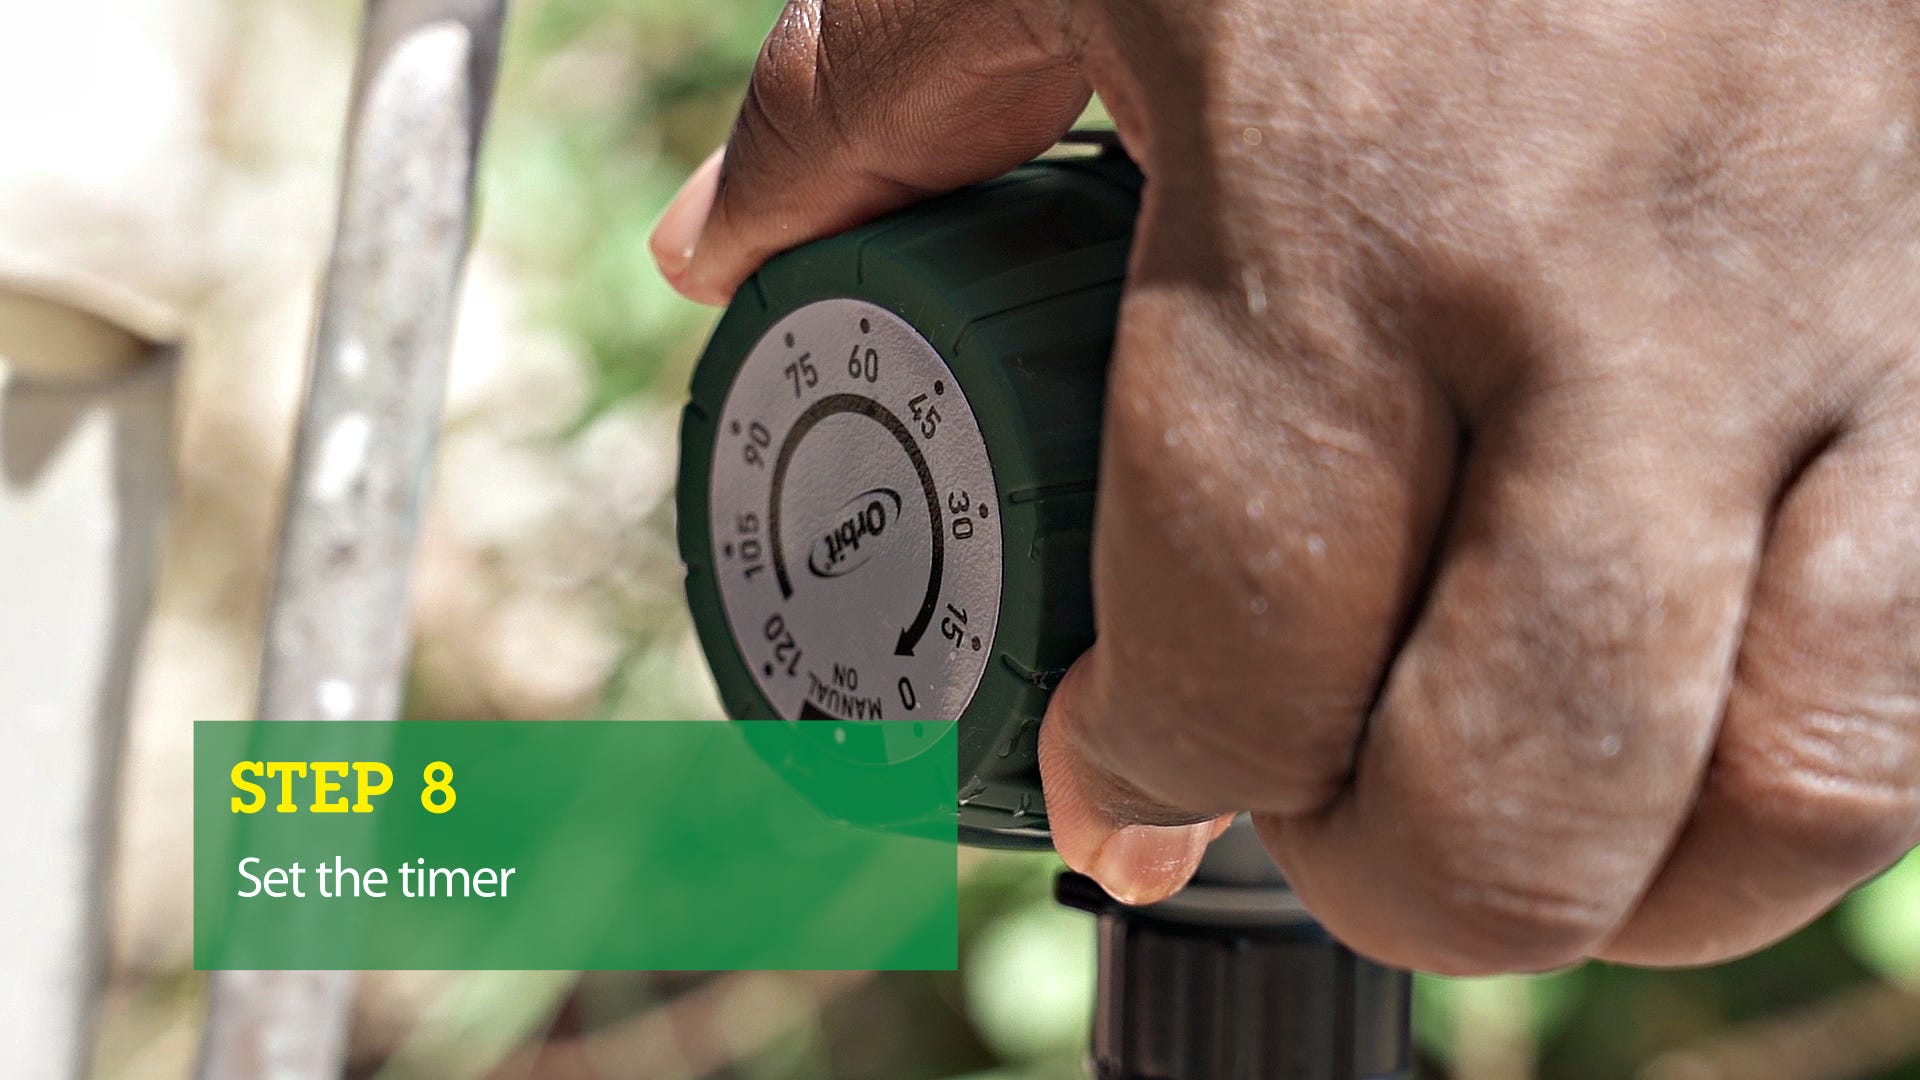
Step 8: Set the timer
Set a timer for when you want the circuit to run and for what period of time. Open the tap and check whether the safety valve is open.
Your drip irrigation system is now up and running, reaching your thirsty plants!
Do you want to tackle other garden projects? Watch our other how-to videos!
At Kooyman we are always happy to help.
Time Needed
1 day
List of Materials
- Emitters (various types)
- 1/4- inch and 1/8- inch Plastic hoses
- Hose adapter
- Tees
- Valves
- Backflow preventer
- (End) caps or tie-rips
- Timer
List of Tools
- Pen and paper
- Ruler
- Tape measure
- Pilot punch (set)
- Emitter tool
- Screwdriver
- Screwdriver square
- Cutting plier
- Hose cutter