Shopping cart
Build Your Own Fence
November 02, 2022
A fence can add a lot of different things to your exterior. It could add privacy and security or add value to your home or brighten up a certain space. No matter what you are looking for, this DIY will teach you how to create your dream exterior. At Kooyman we have various options in
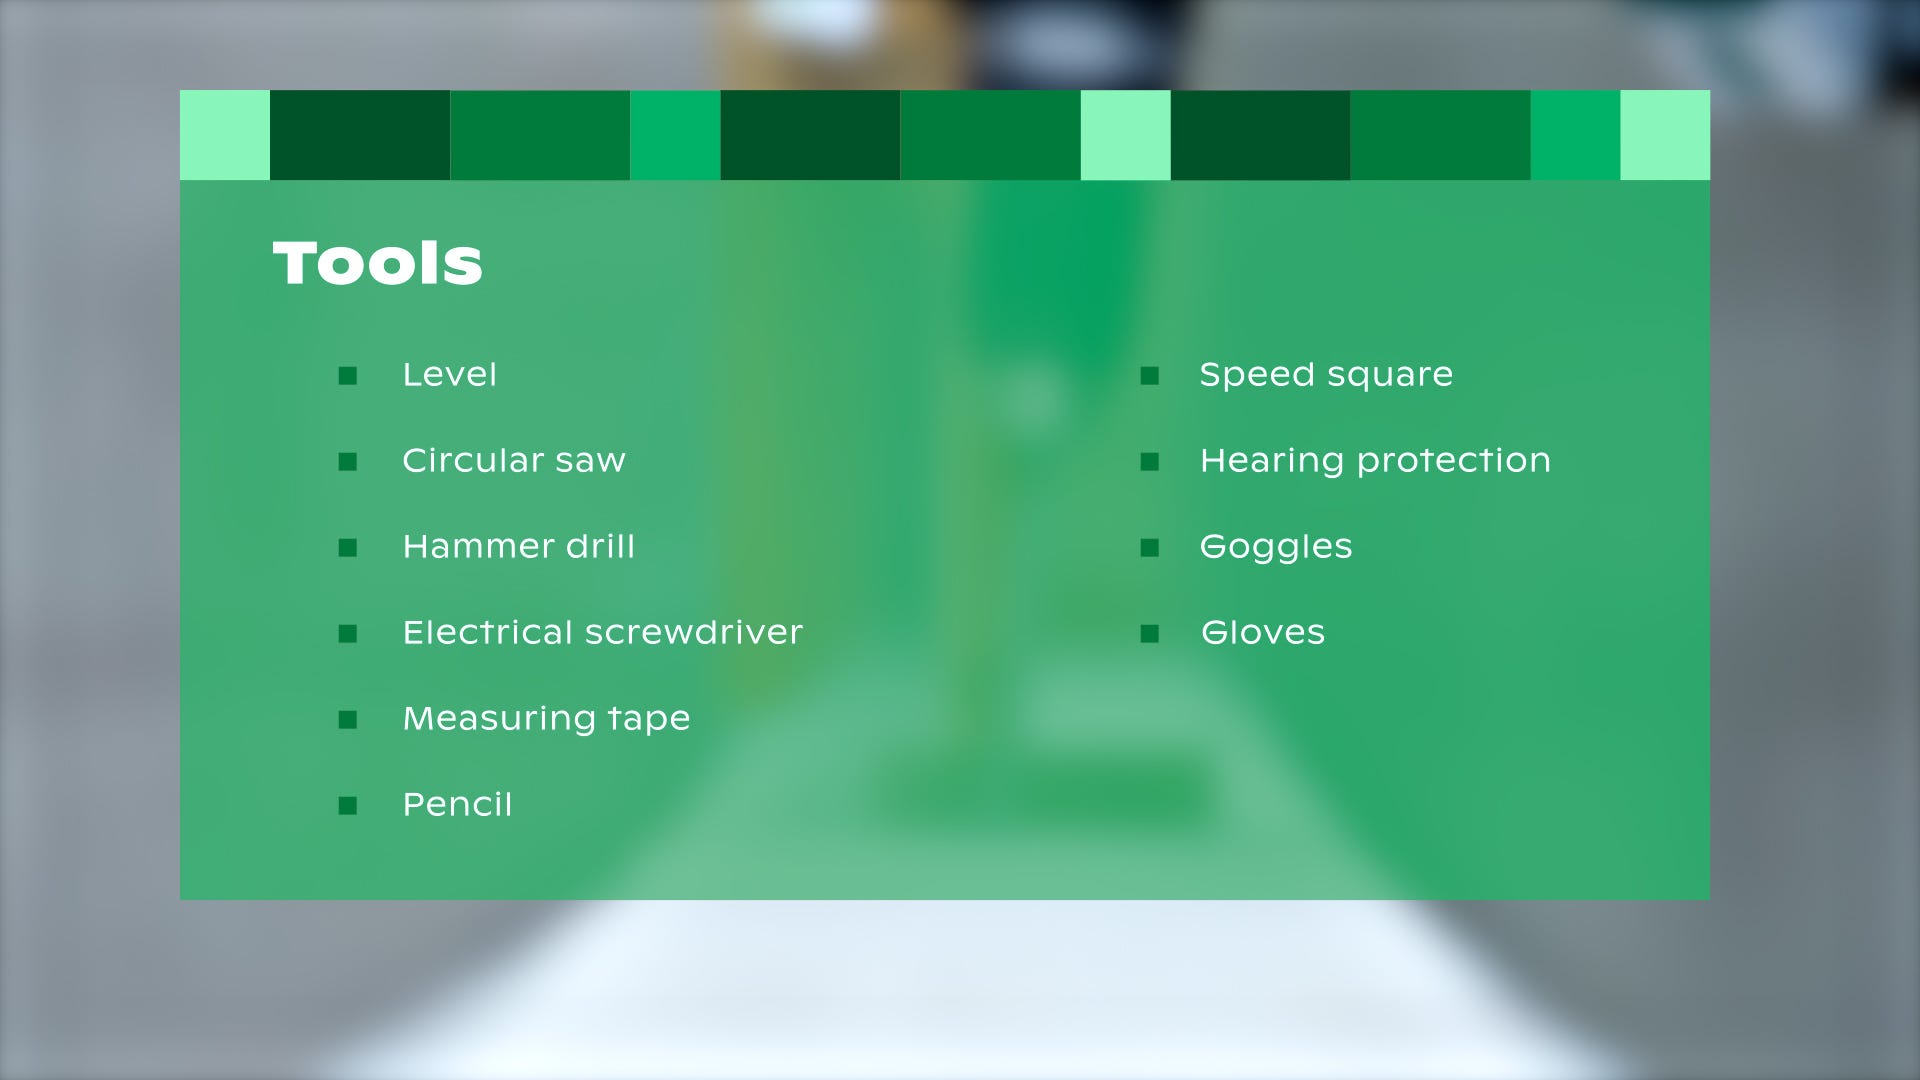
fences, from PVC threaded open fences to wooden fence panels. We have chosen to build a wooden fence on top of a small concrete wall, we think that this will truly make the rest of the residence shine. You can easily change the height of the fence or choose to add different panels to make it seamlessly fit your style. Building a fence is not very difficult, however it is a two-man job. Make sure you have the following tools and materials.
- Time
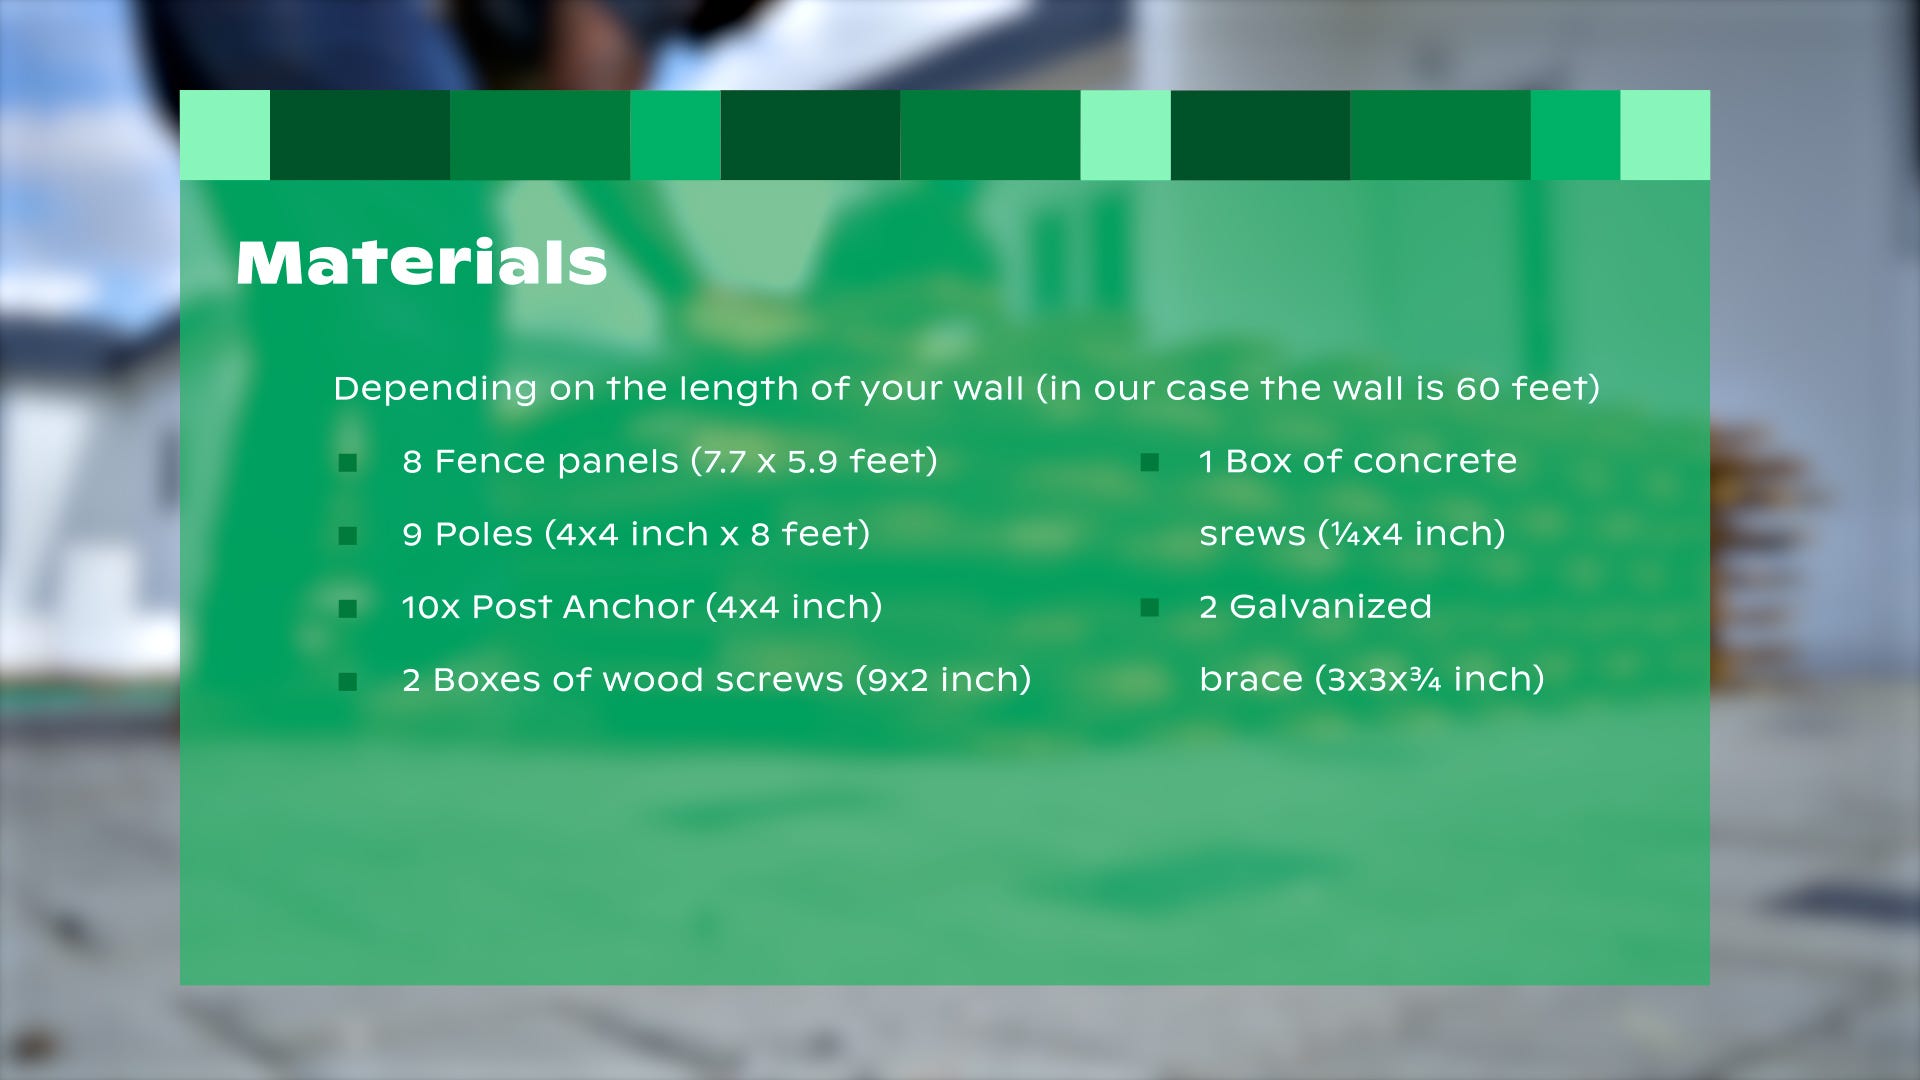
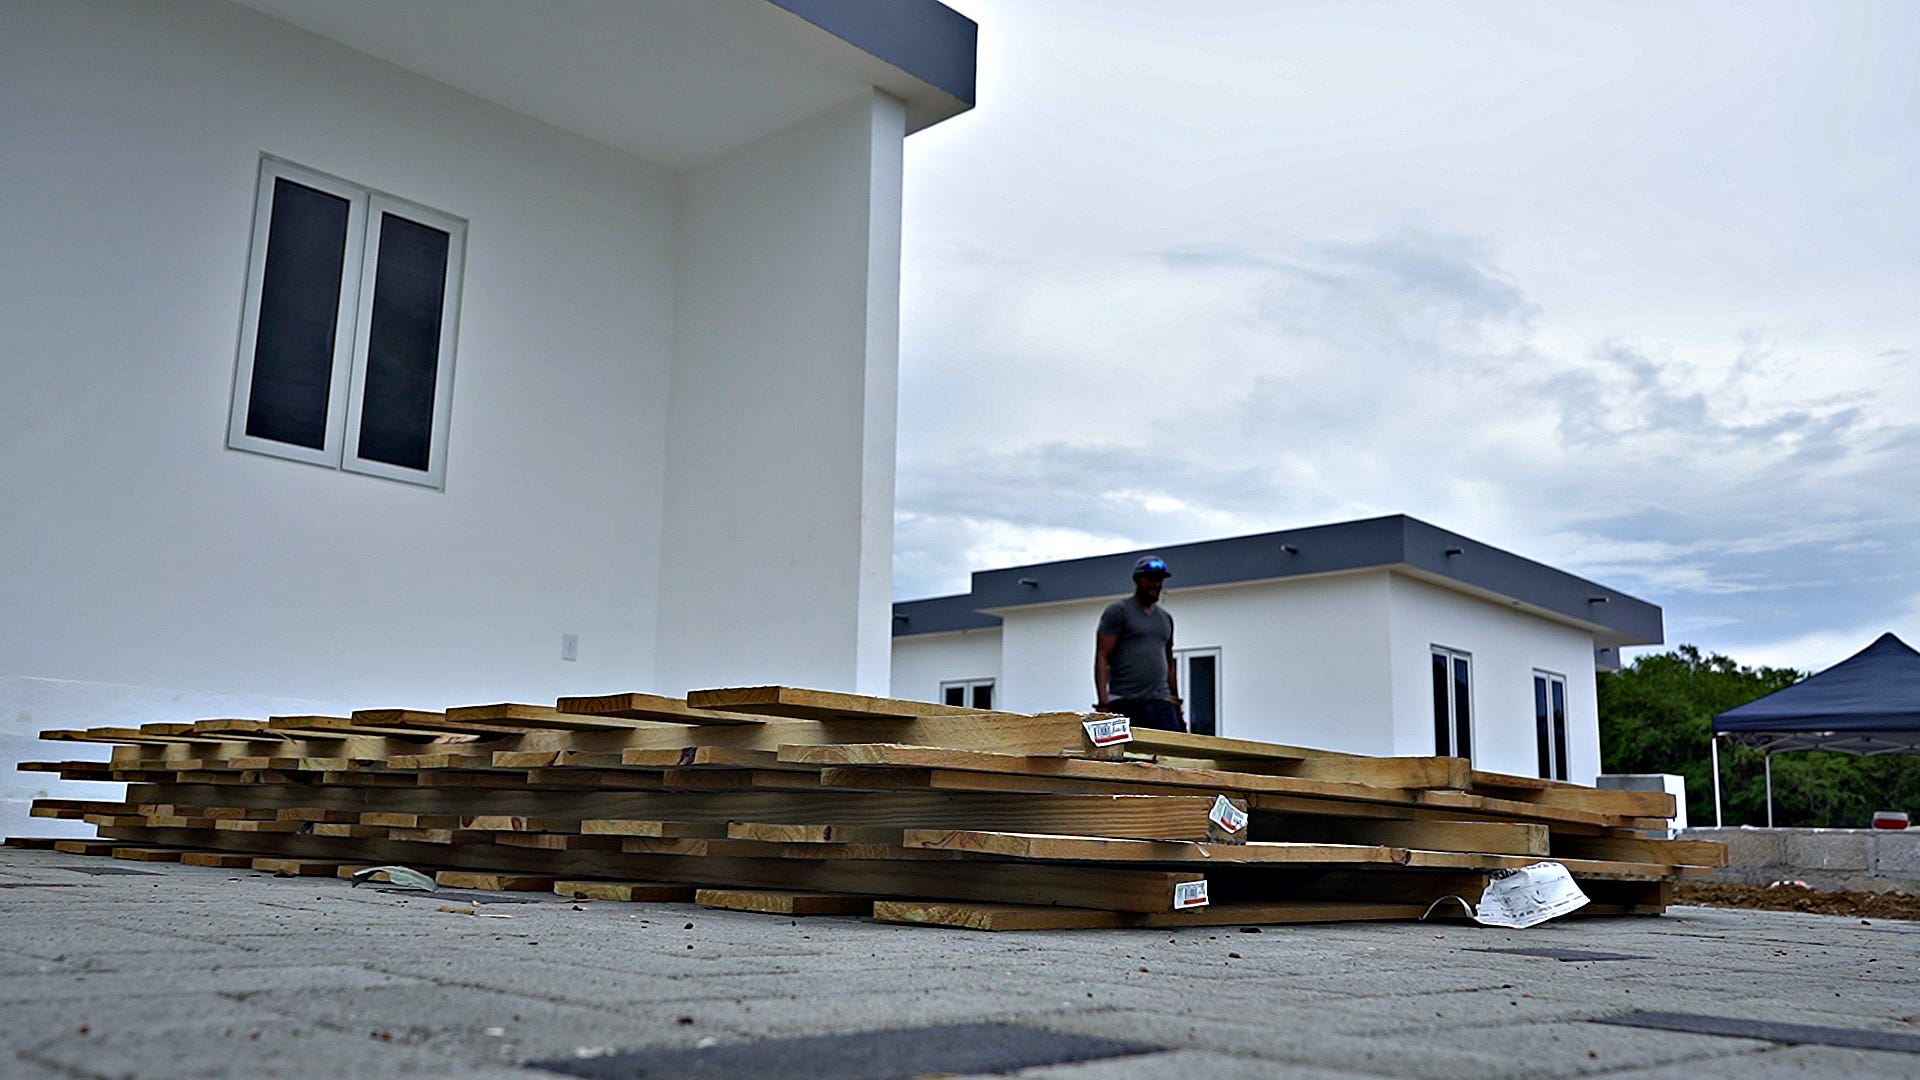
Step 1: Preparing the materials
First of all it is important to know the amount of fence panels and poles you need for your amazing new fence. The fence panels we have chosen are 7.7 feet in width. We divide the total length by that and round upwards. We have 60 feet thus we need to use 8 panels in total. The total amount of poles needed is one more than the total amount of panels used. In our case that is 9 poles down!
Step 2: Decide your foundation
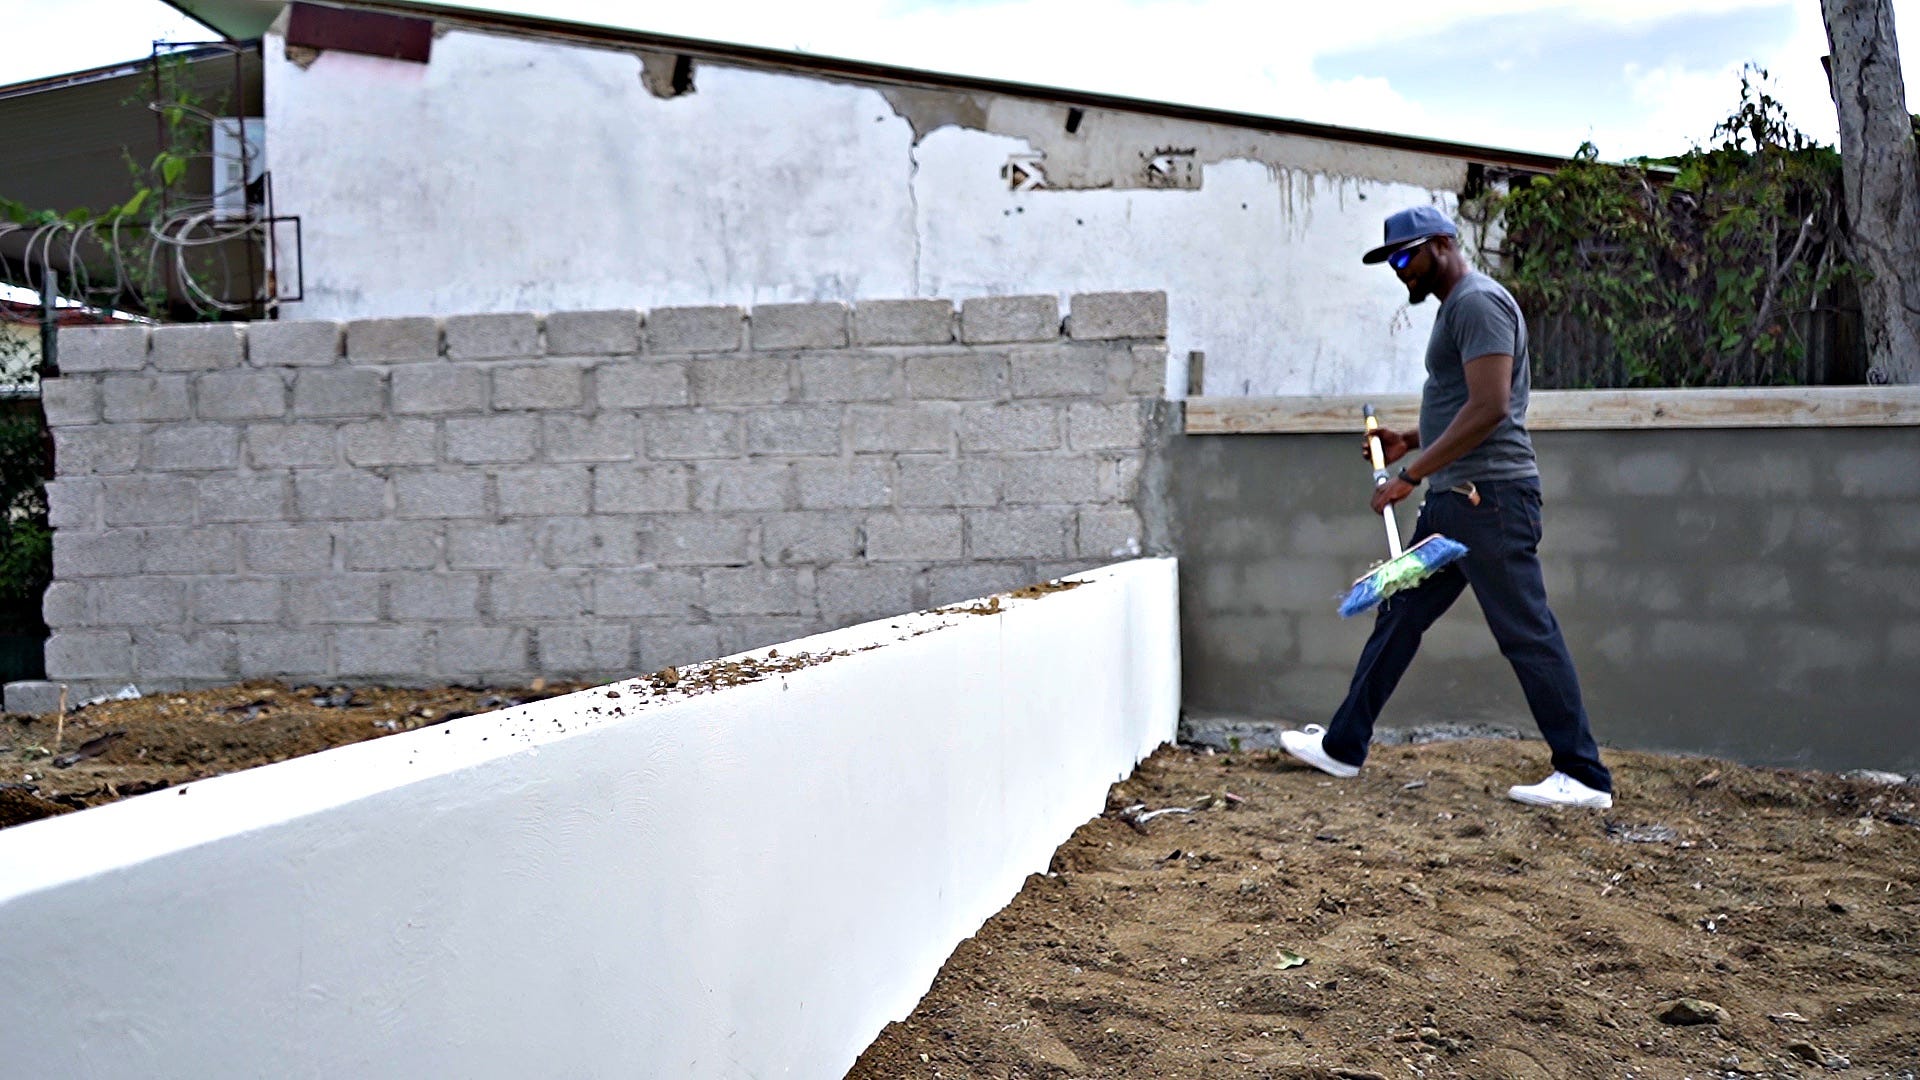
Secondly, you need to think about the foundation on which you would like to build your fence. In our project we have a low concrete wall that is perfect to put our fence on top of. Clean your foundation if needed. This will give you a nice and clean workspace.
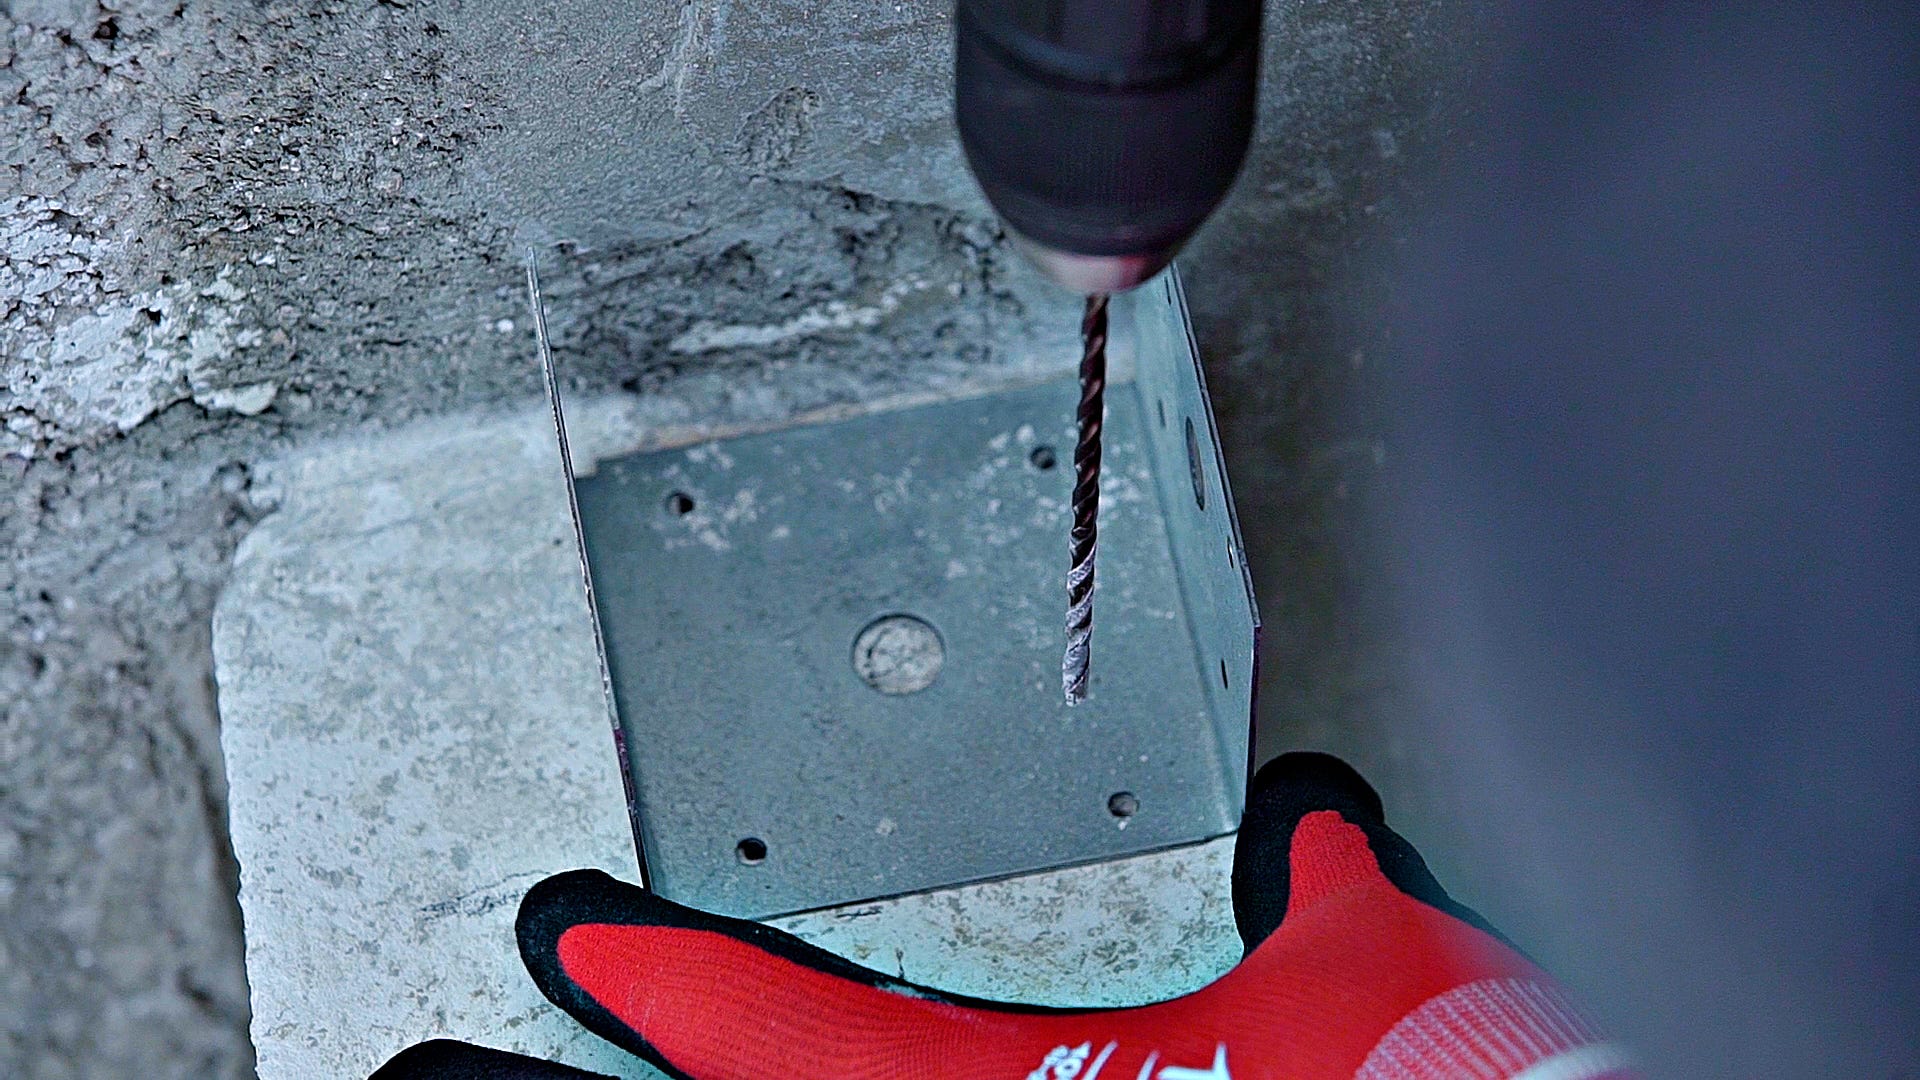
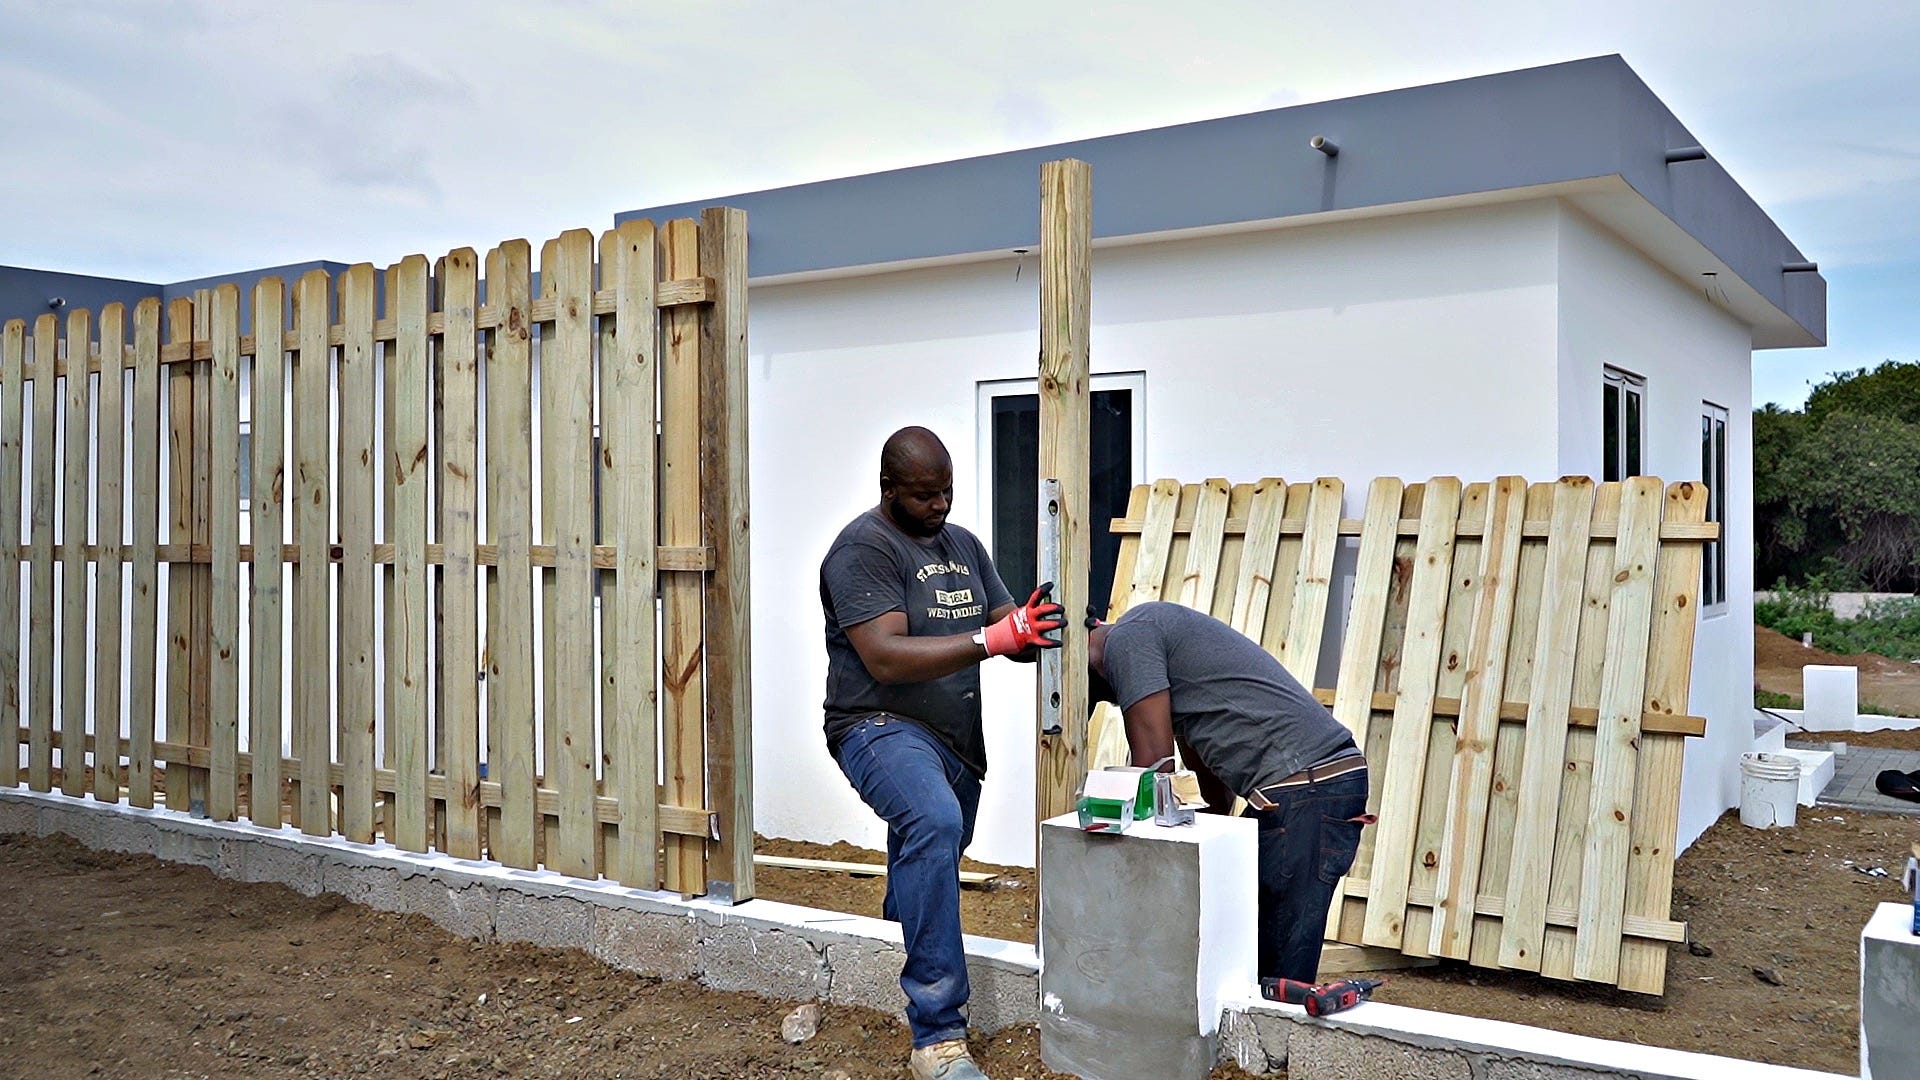
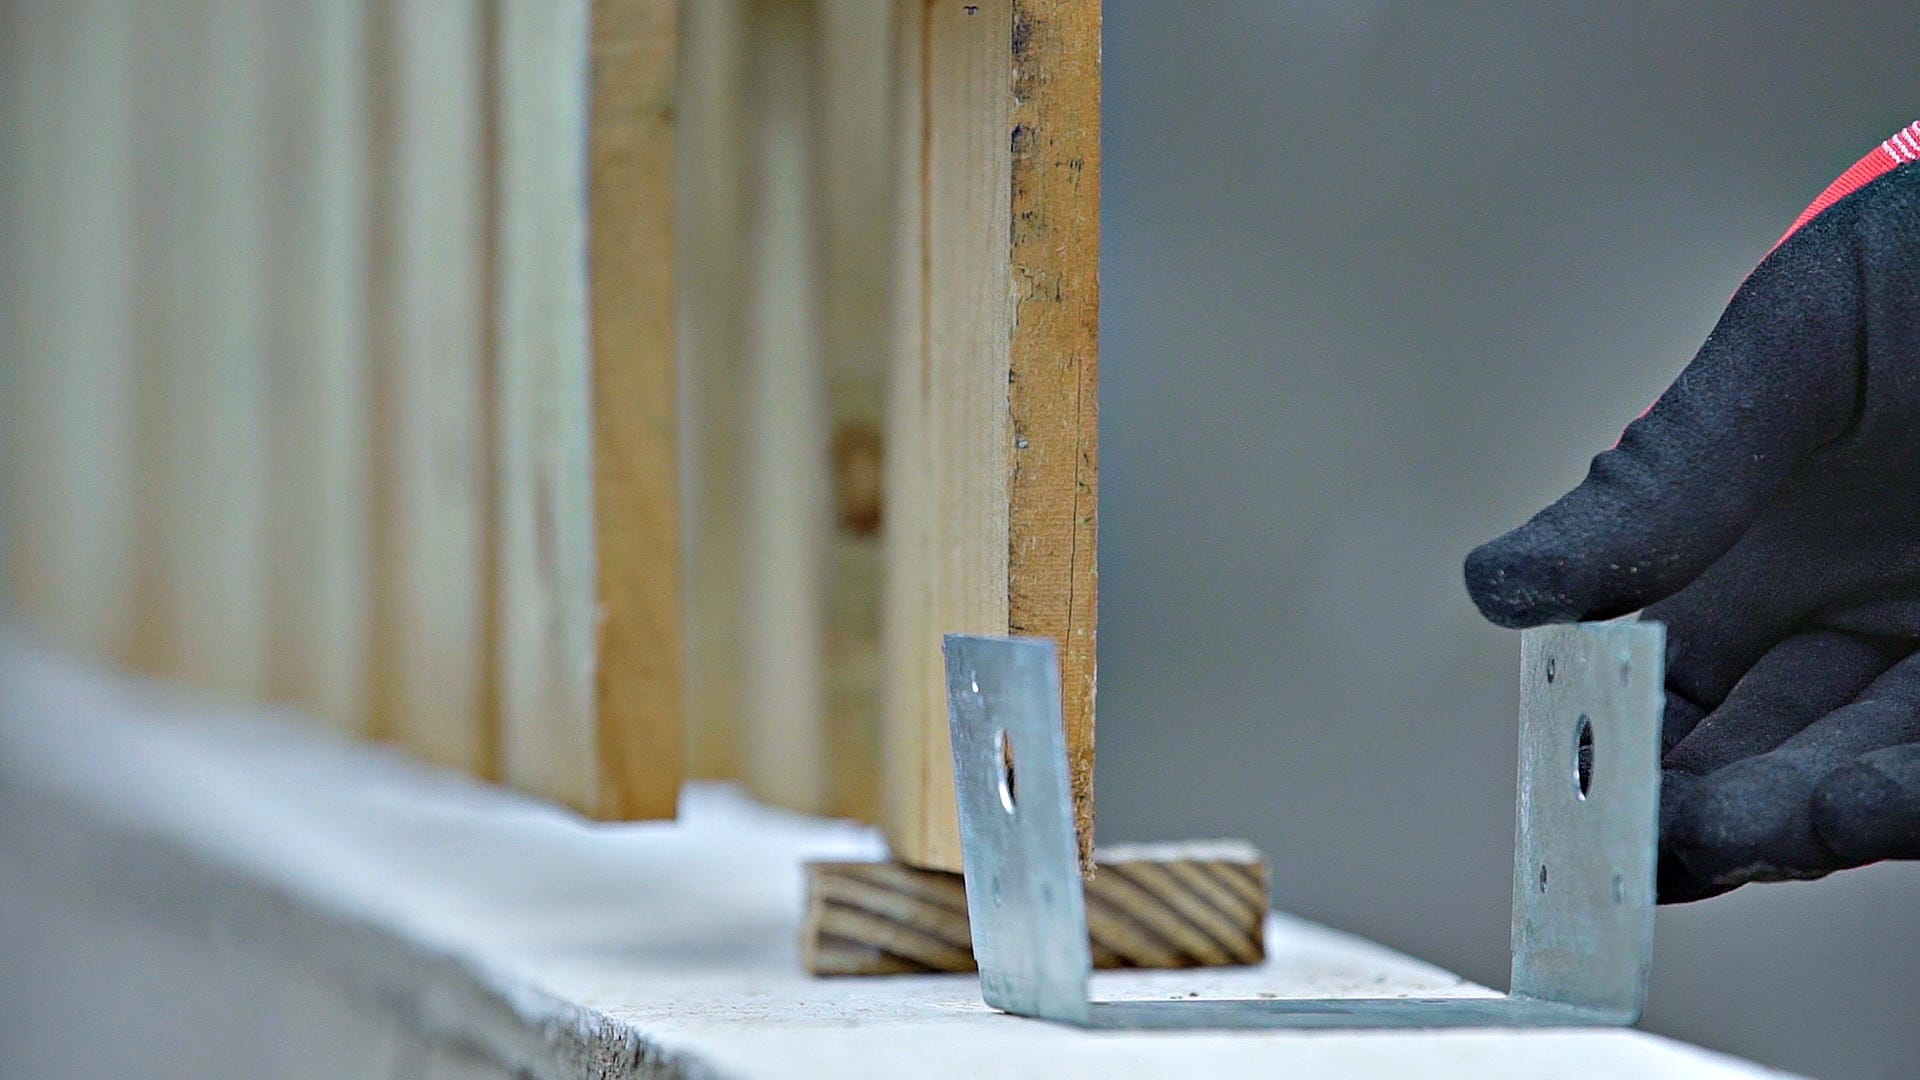
Step 3: Place the first post anchor
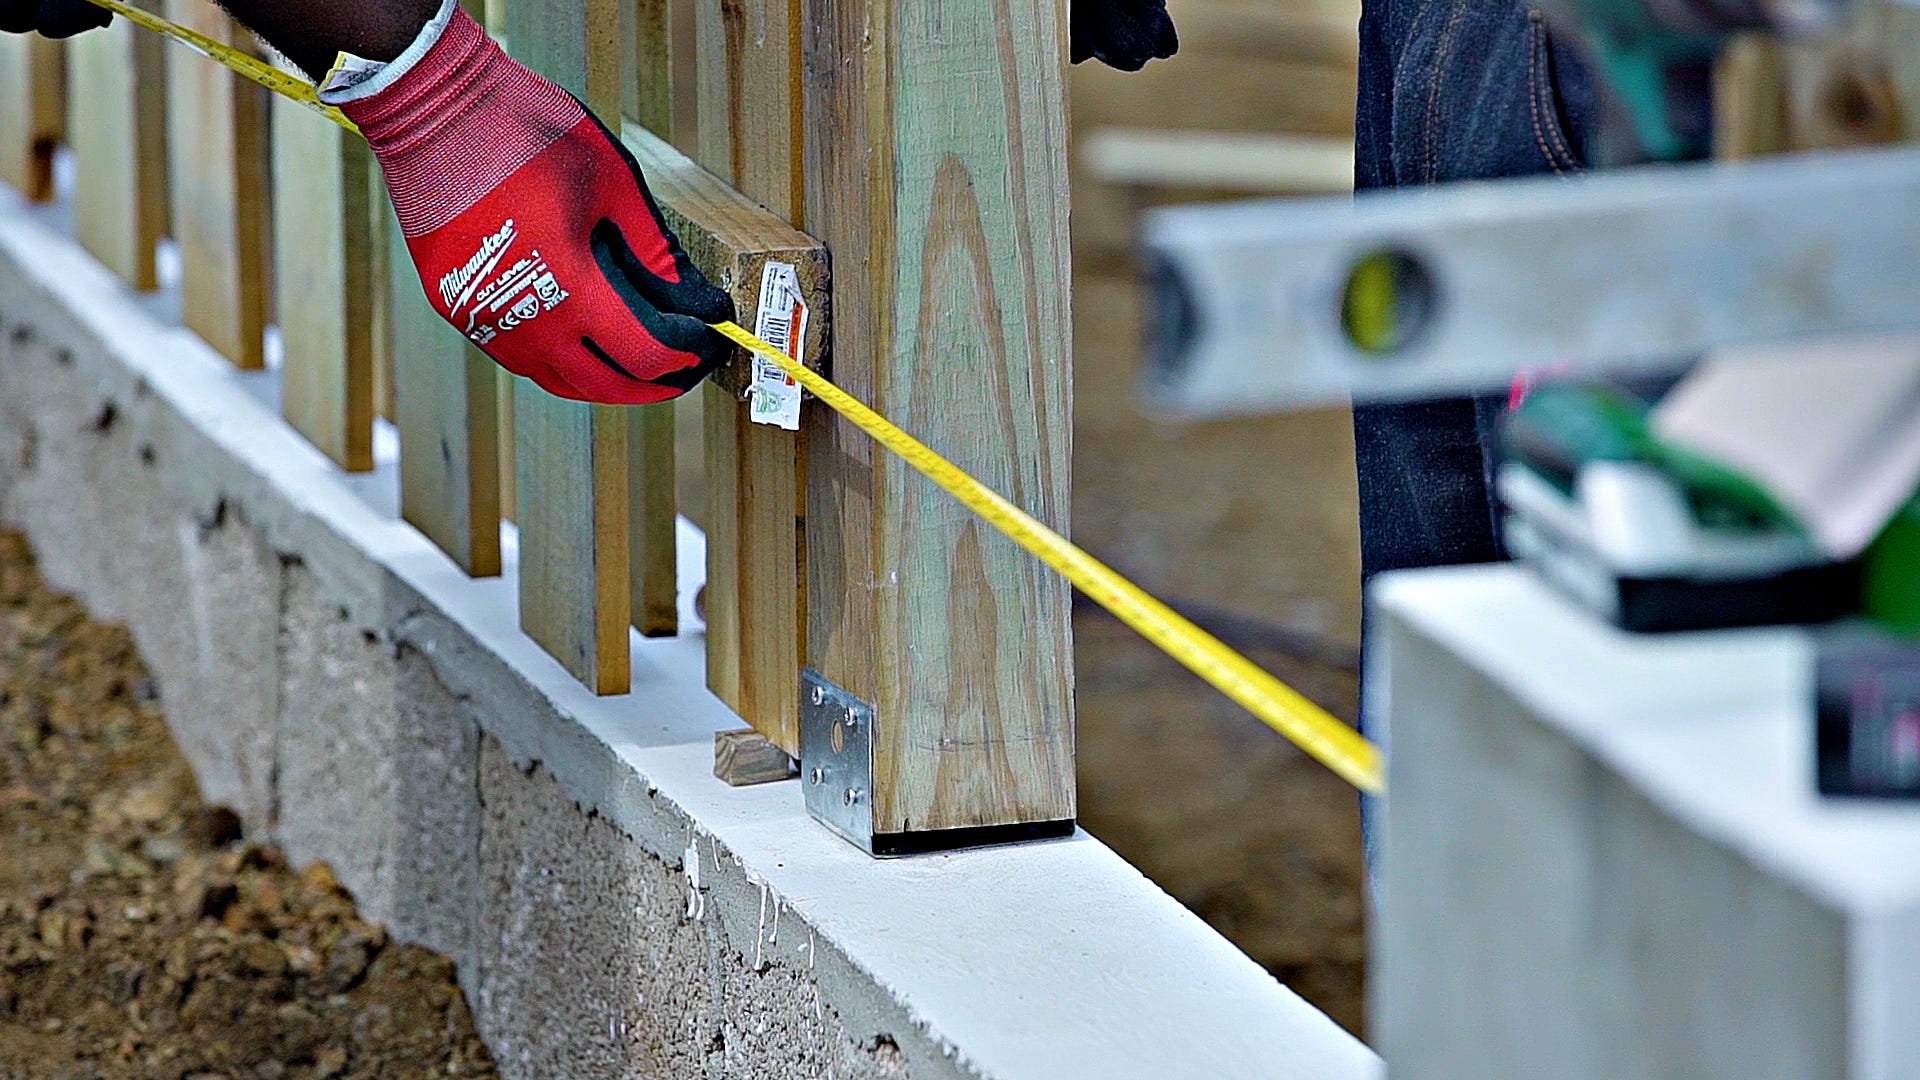
We start with securing one pole to the wall. Determine exactly where you want to place the post anchor. The post anchors ensure that the poles will be strapped in tight, and your fence will not fall over when it gets windy! Use the hammer drill to pre-drill the holes in the foundation. Use the driver to place the screws in the pre-drilled holes to fasten the post anchor.
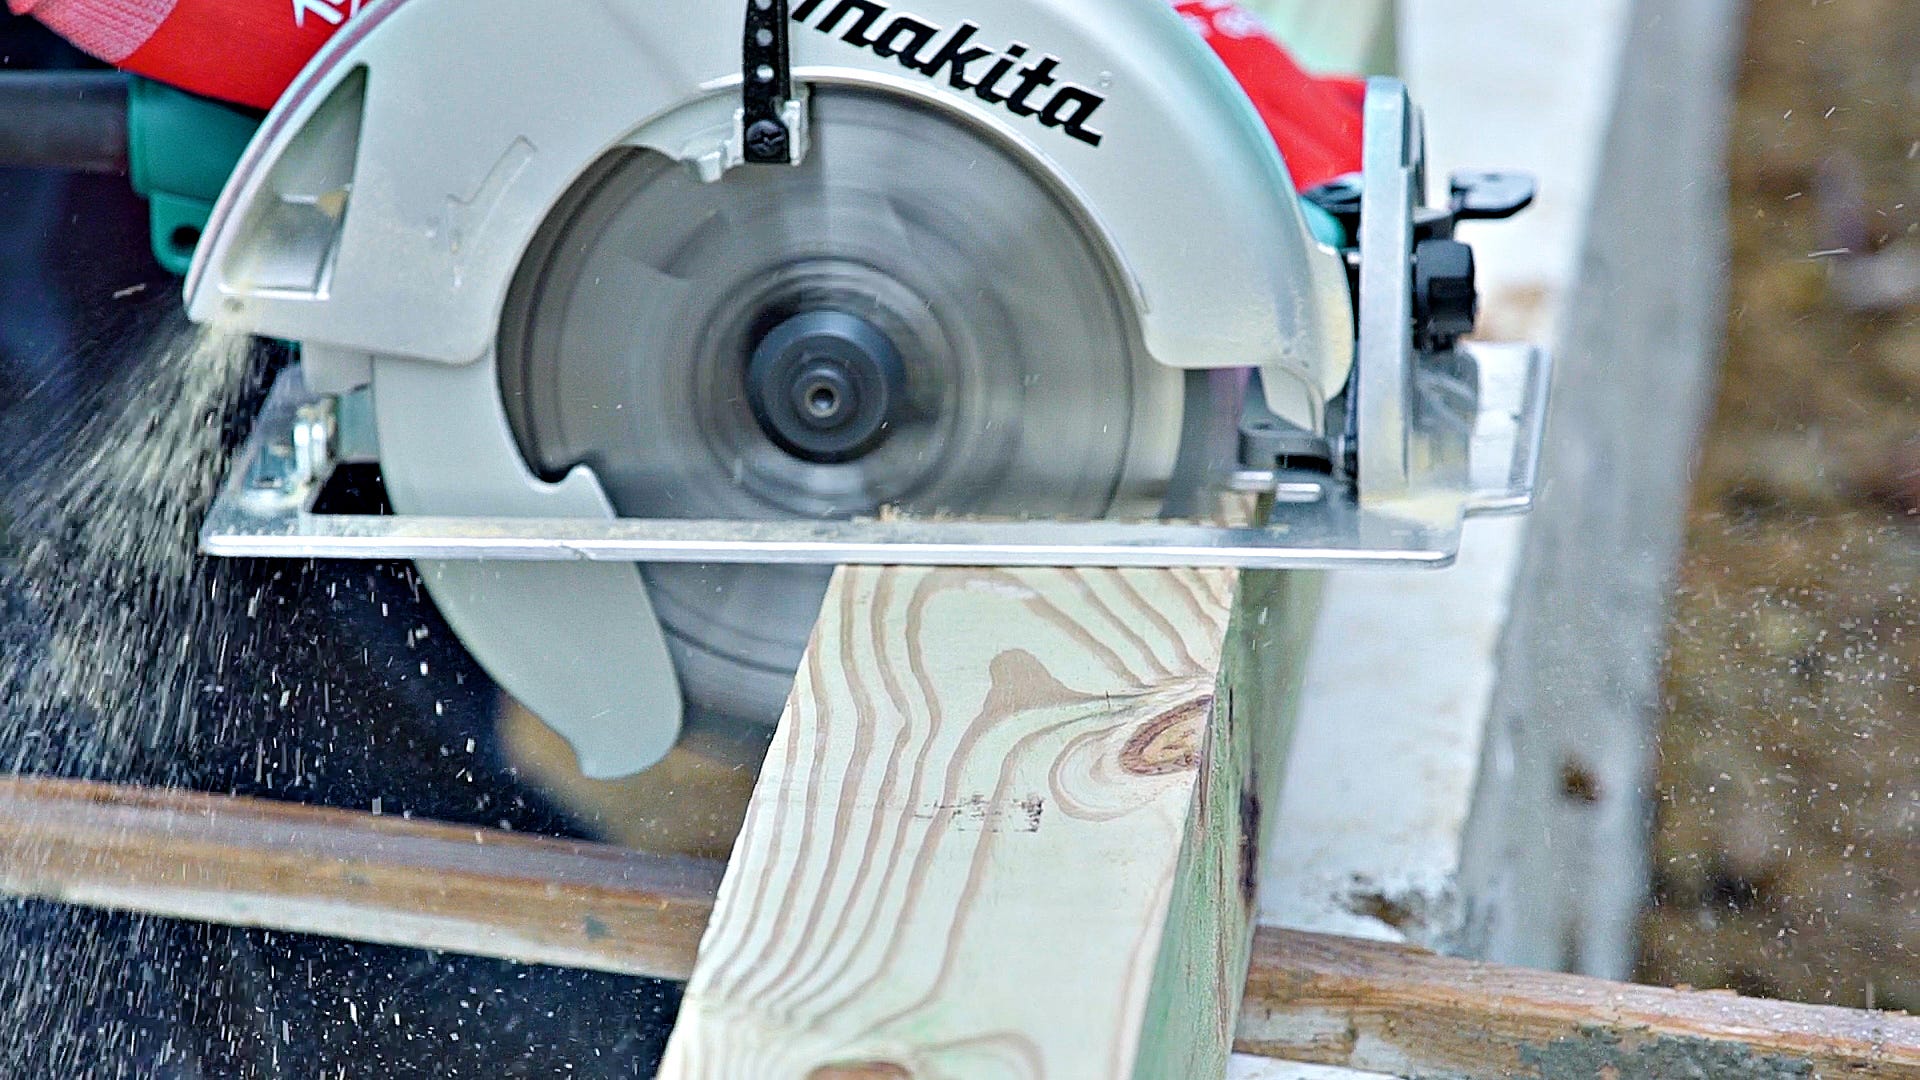
Step 4: Saw the first pole
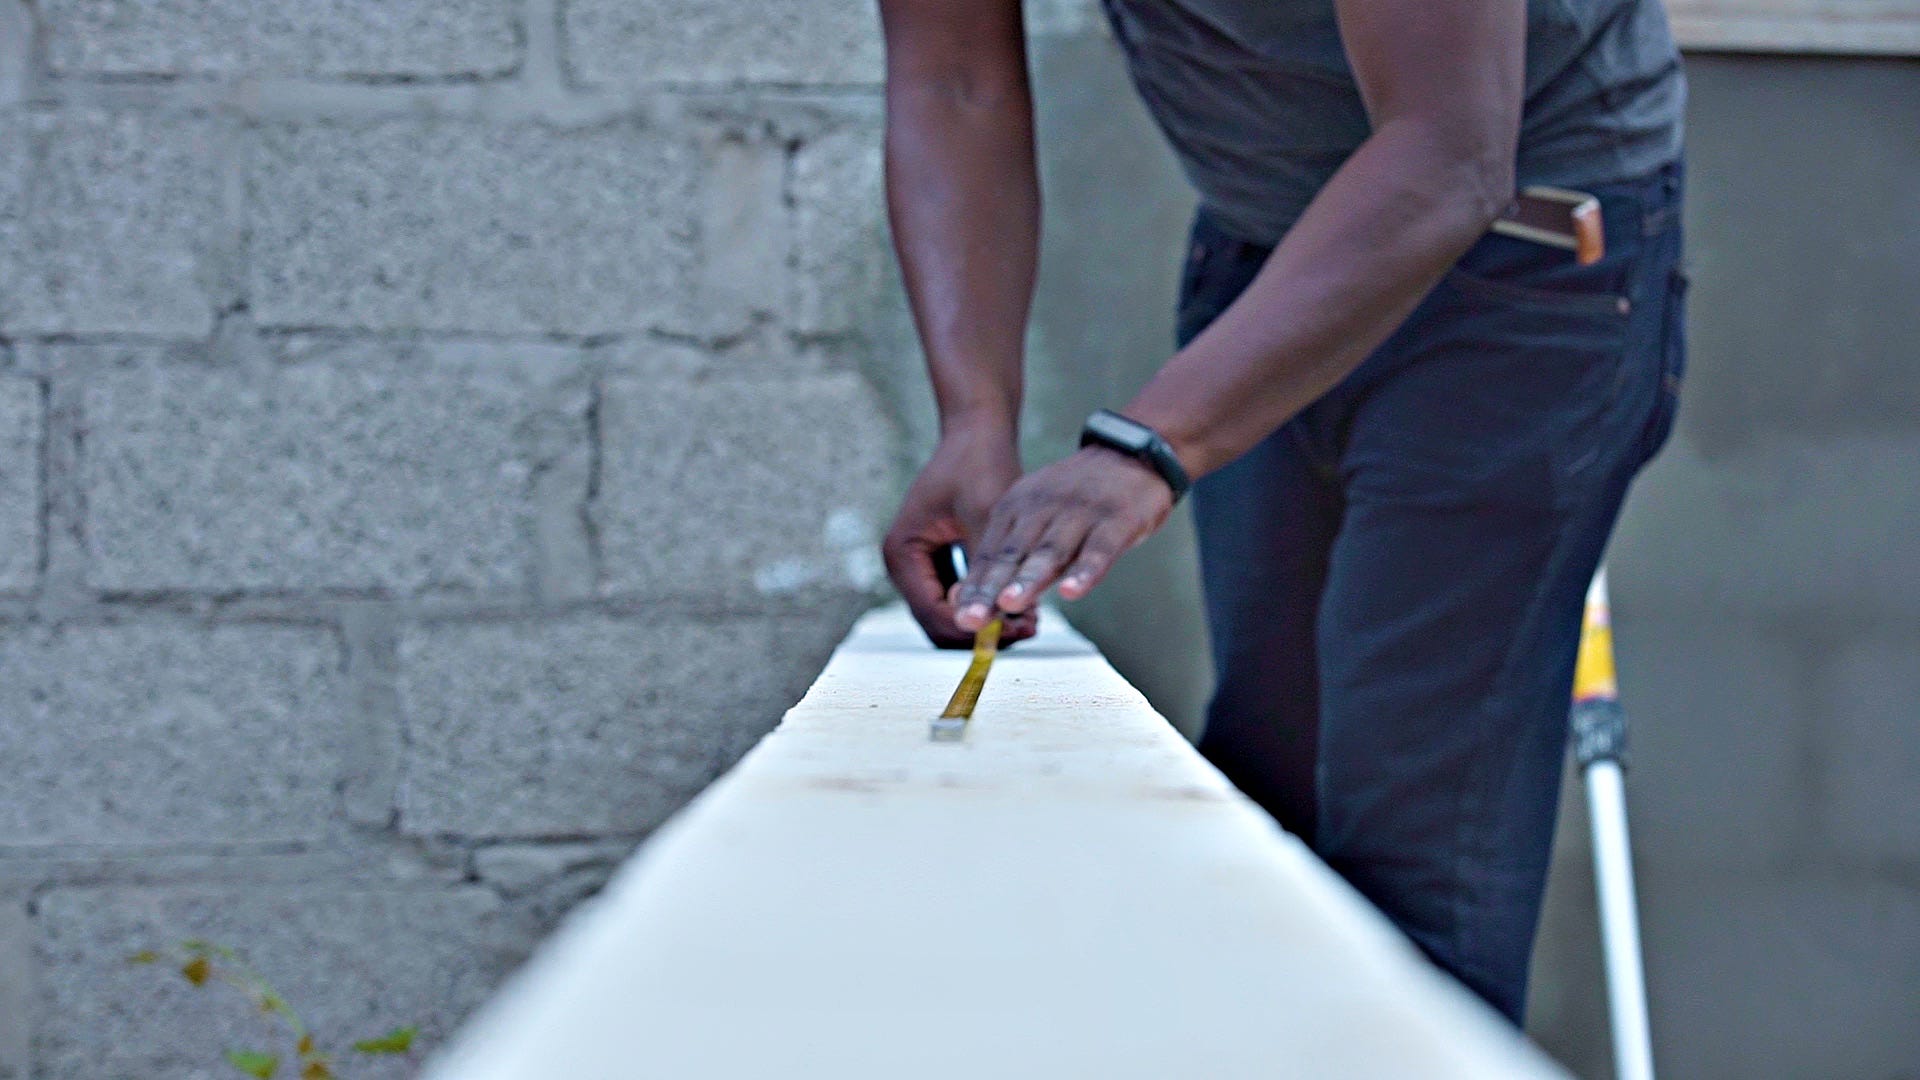
To saw the pole to the right size you will measure the height of the fence and add the amount of inches the fence will be placed above the foundation. Use a hand or circular saw for this step. Make sure you use gloves and glasses to protect yourself. If the blade of the saw is not large enough to cut the pole at once, use a pencil to mark all sides of the pole. After one side is cut you can turn the pole and keep sawing until all four sides are done.
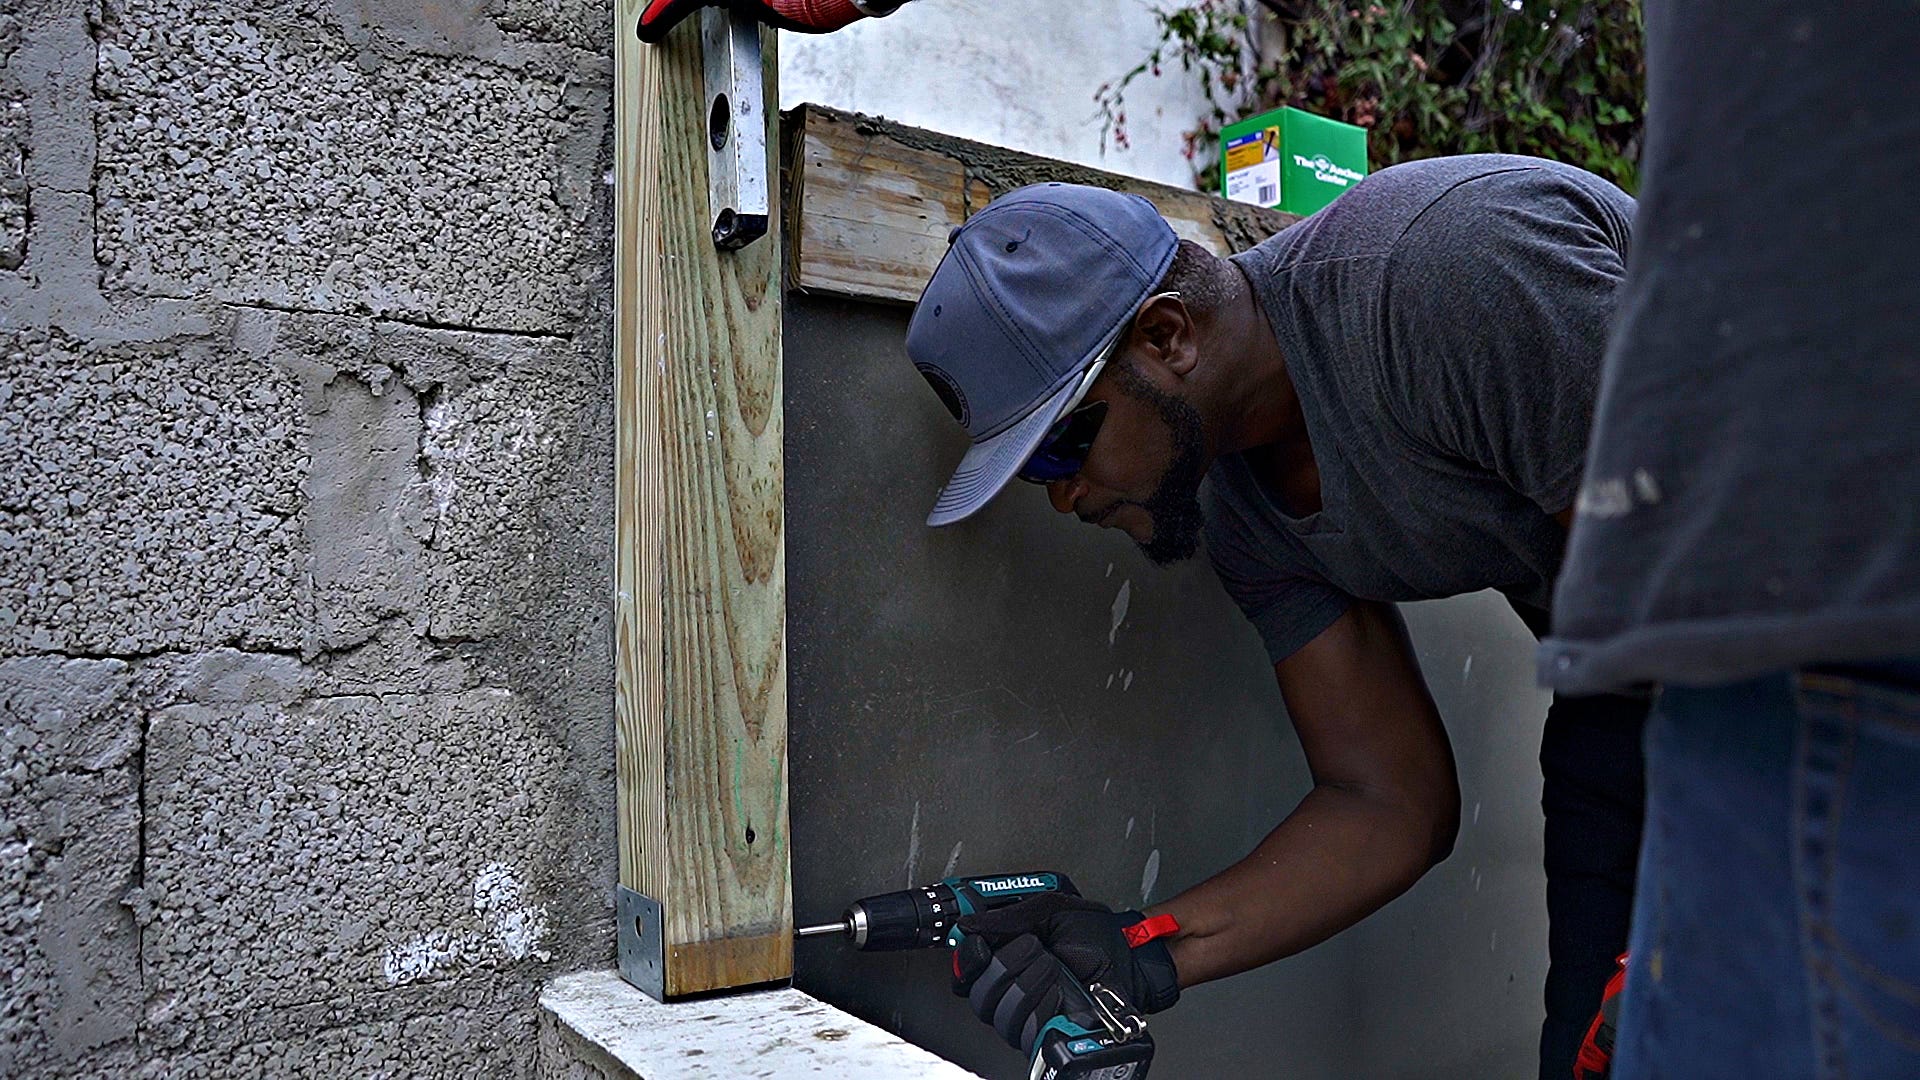
Step 5: Secure the pole to the wall
You can now put the pole in place and drive the screws into the pole while another person helps to keep the pole level. Next, secure the pole to the wall using a galvanized brace. You pre-drill the holes here as well and drive the screws in using the driver. Don’t forget to use the level to make sure the pole is 100% vertical.
Step 6: Place the first fence
It is time to start placing the fence onto the foundation. By placing some leftover wood on the foundation, you can make a floating fence. Once the fence is in place you can drive in the screws to fasten it to the pole.
Step 7: Place the second pole
The fence we have just placed determines the exact location of the second post anchor. Make sure you position the anchor so that you can attach both fences to the pole. Once again pre drill your holes and drive in the screws. You can now saw the second pole to size. Once this is done you can install the second pole on the anchor. Use the level to adjust the pole to the right position.
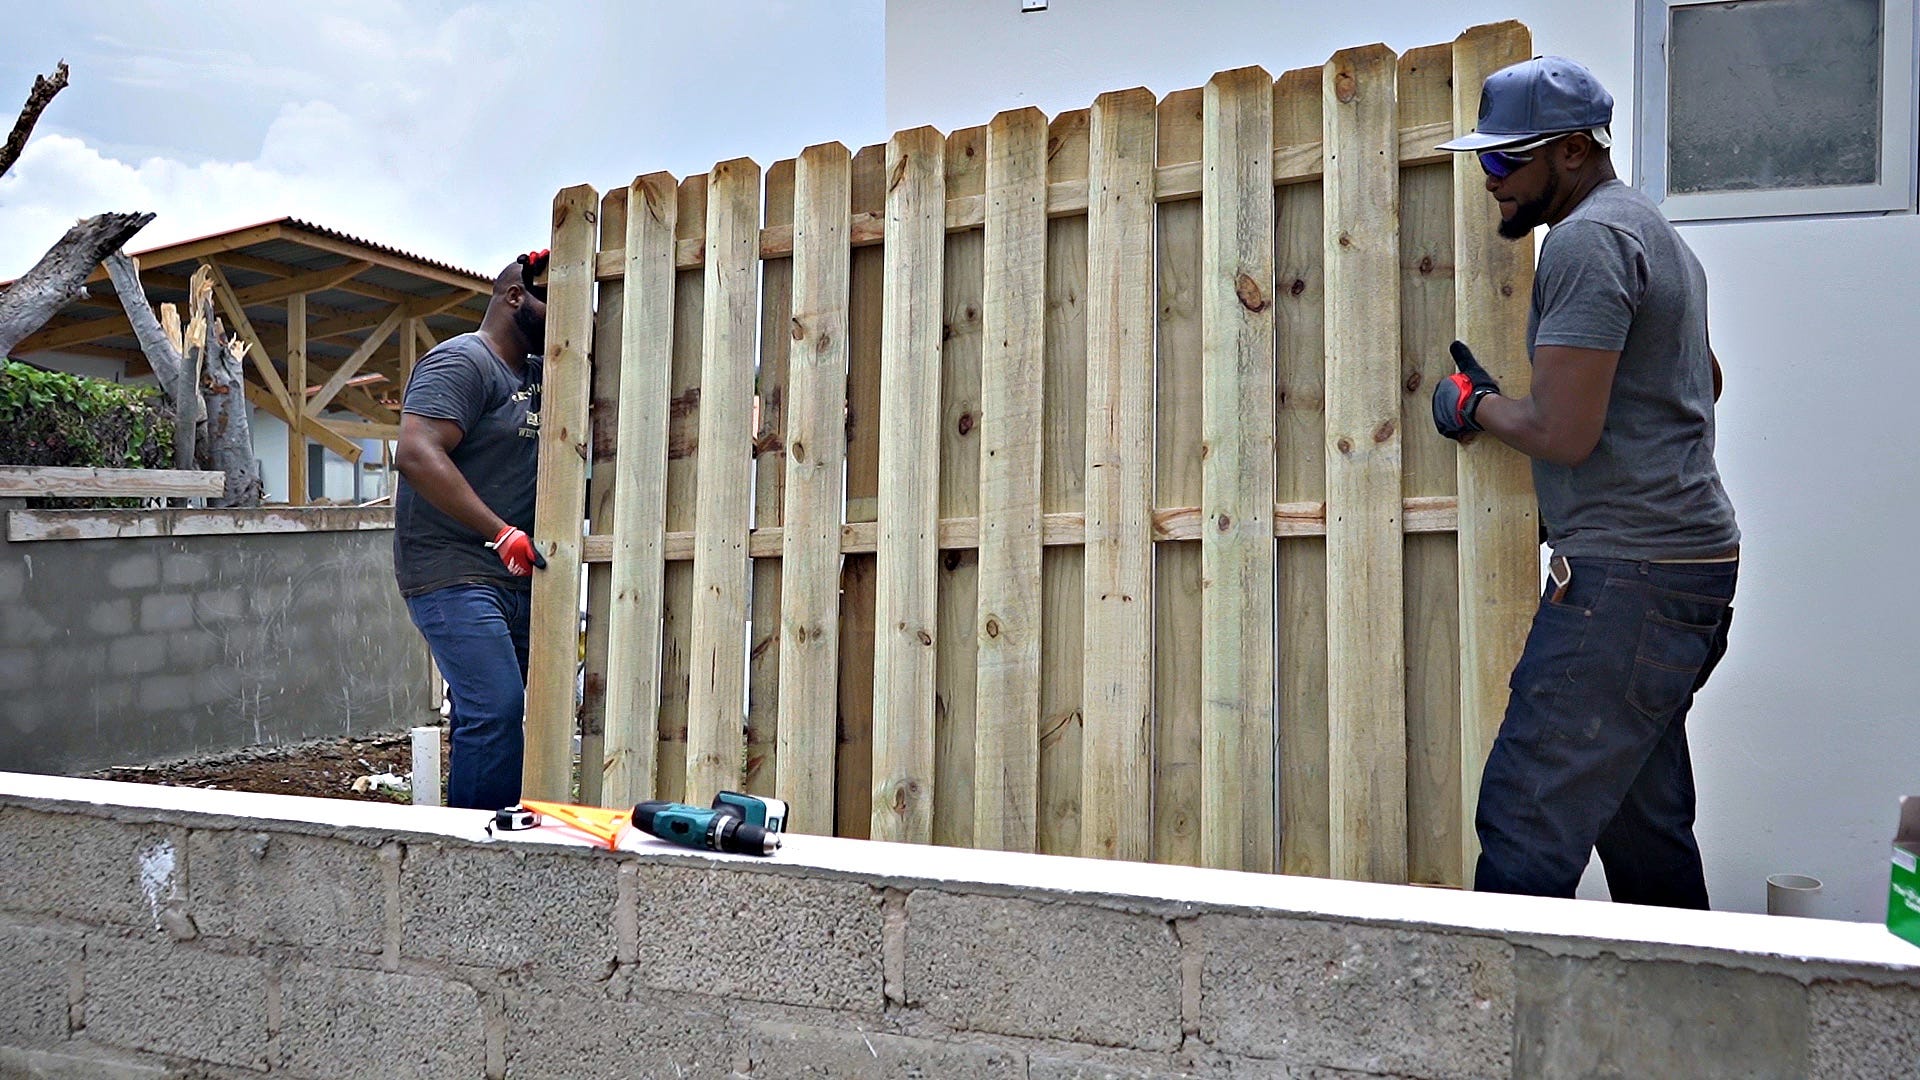
Step 8: Install the rest
Now install the second fence and repeat placing the anchors, poles, and fences until you reach the end.
Step 9: Install the last pole
Once you have reached the last fence you need to put the final pole into place. You can use the same steps to secure the pole to the bottom and side of the pole using a galvanized brace.
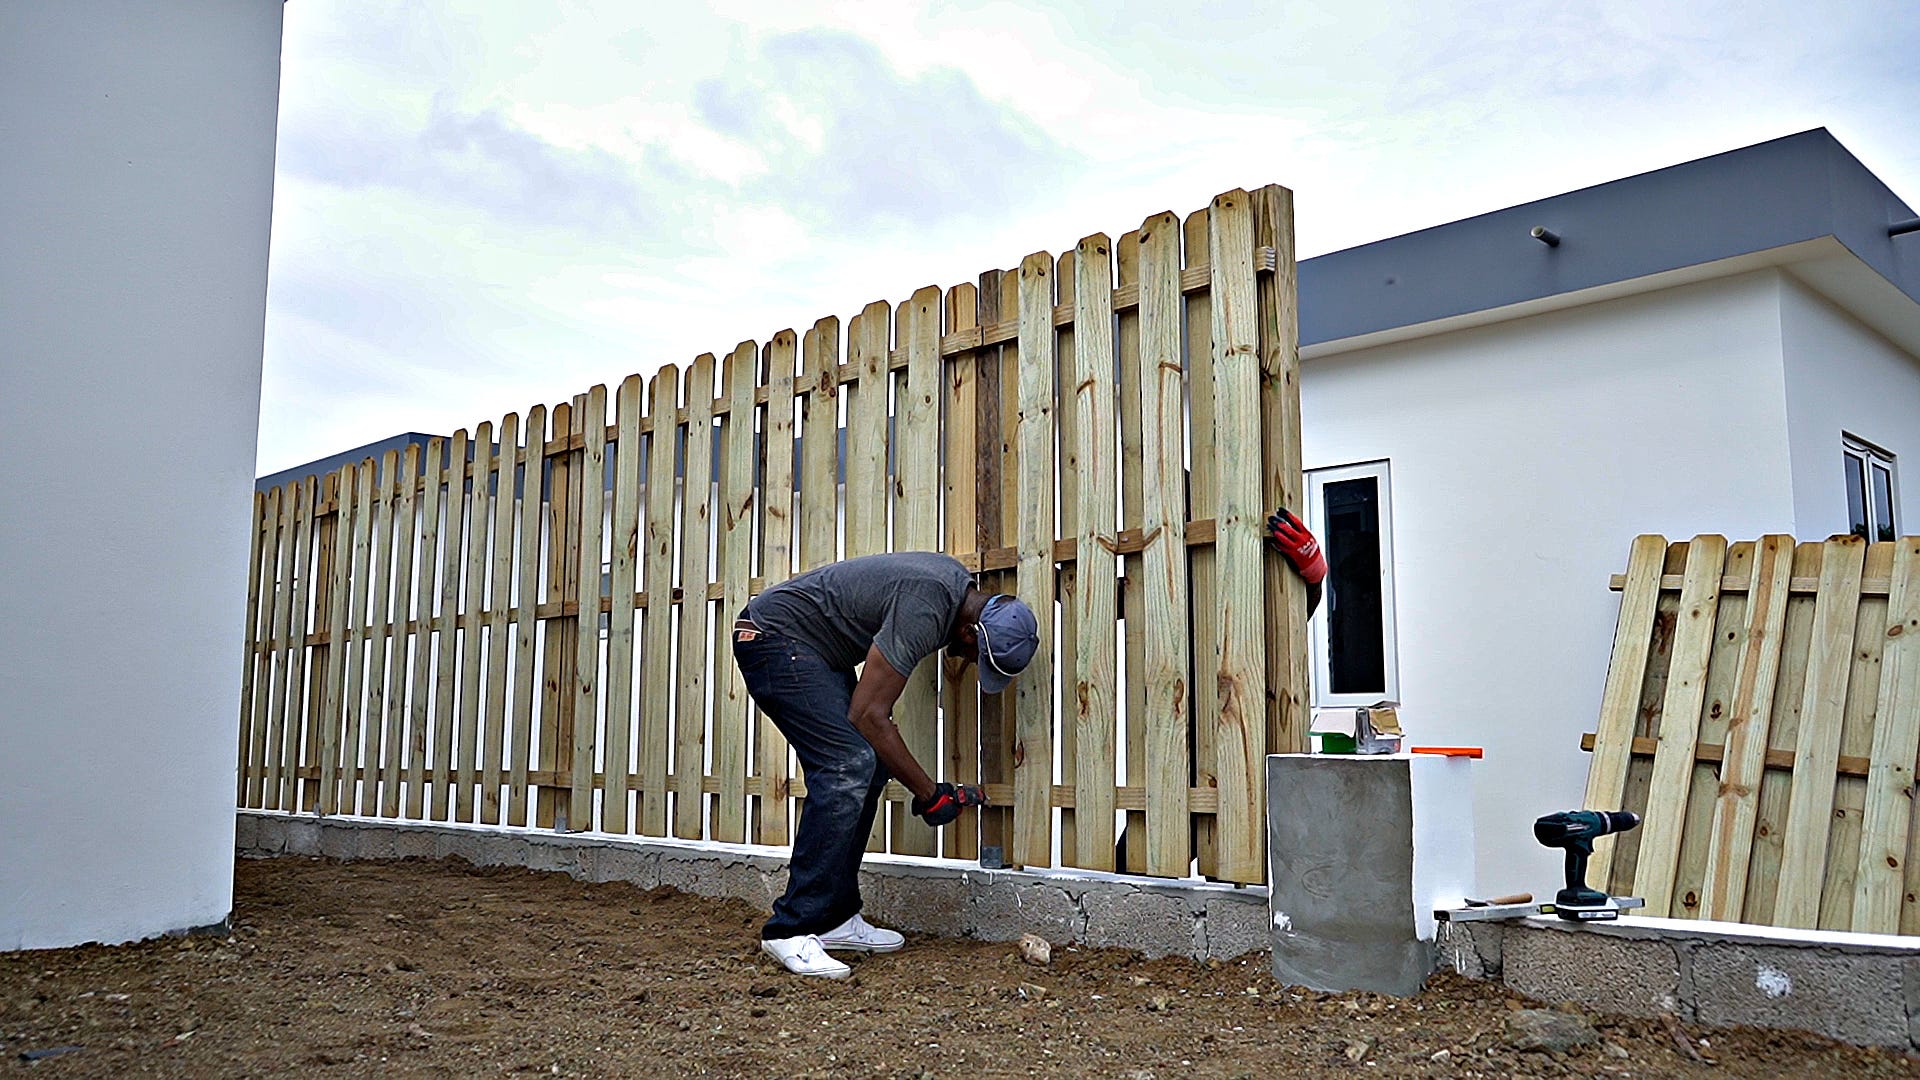
Step 10: Cut the fence to size
It can be necessary to saw the last fence to size. Measure the space that you need to the pole and mark these points on the fence. Use a hand or circular saw to cut the fence to the right size.
Step 11: Place the last fence
Now you can place the last fence onto the poles. Remember to use the scrap wood to keep the fence floating above the foundation.
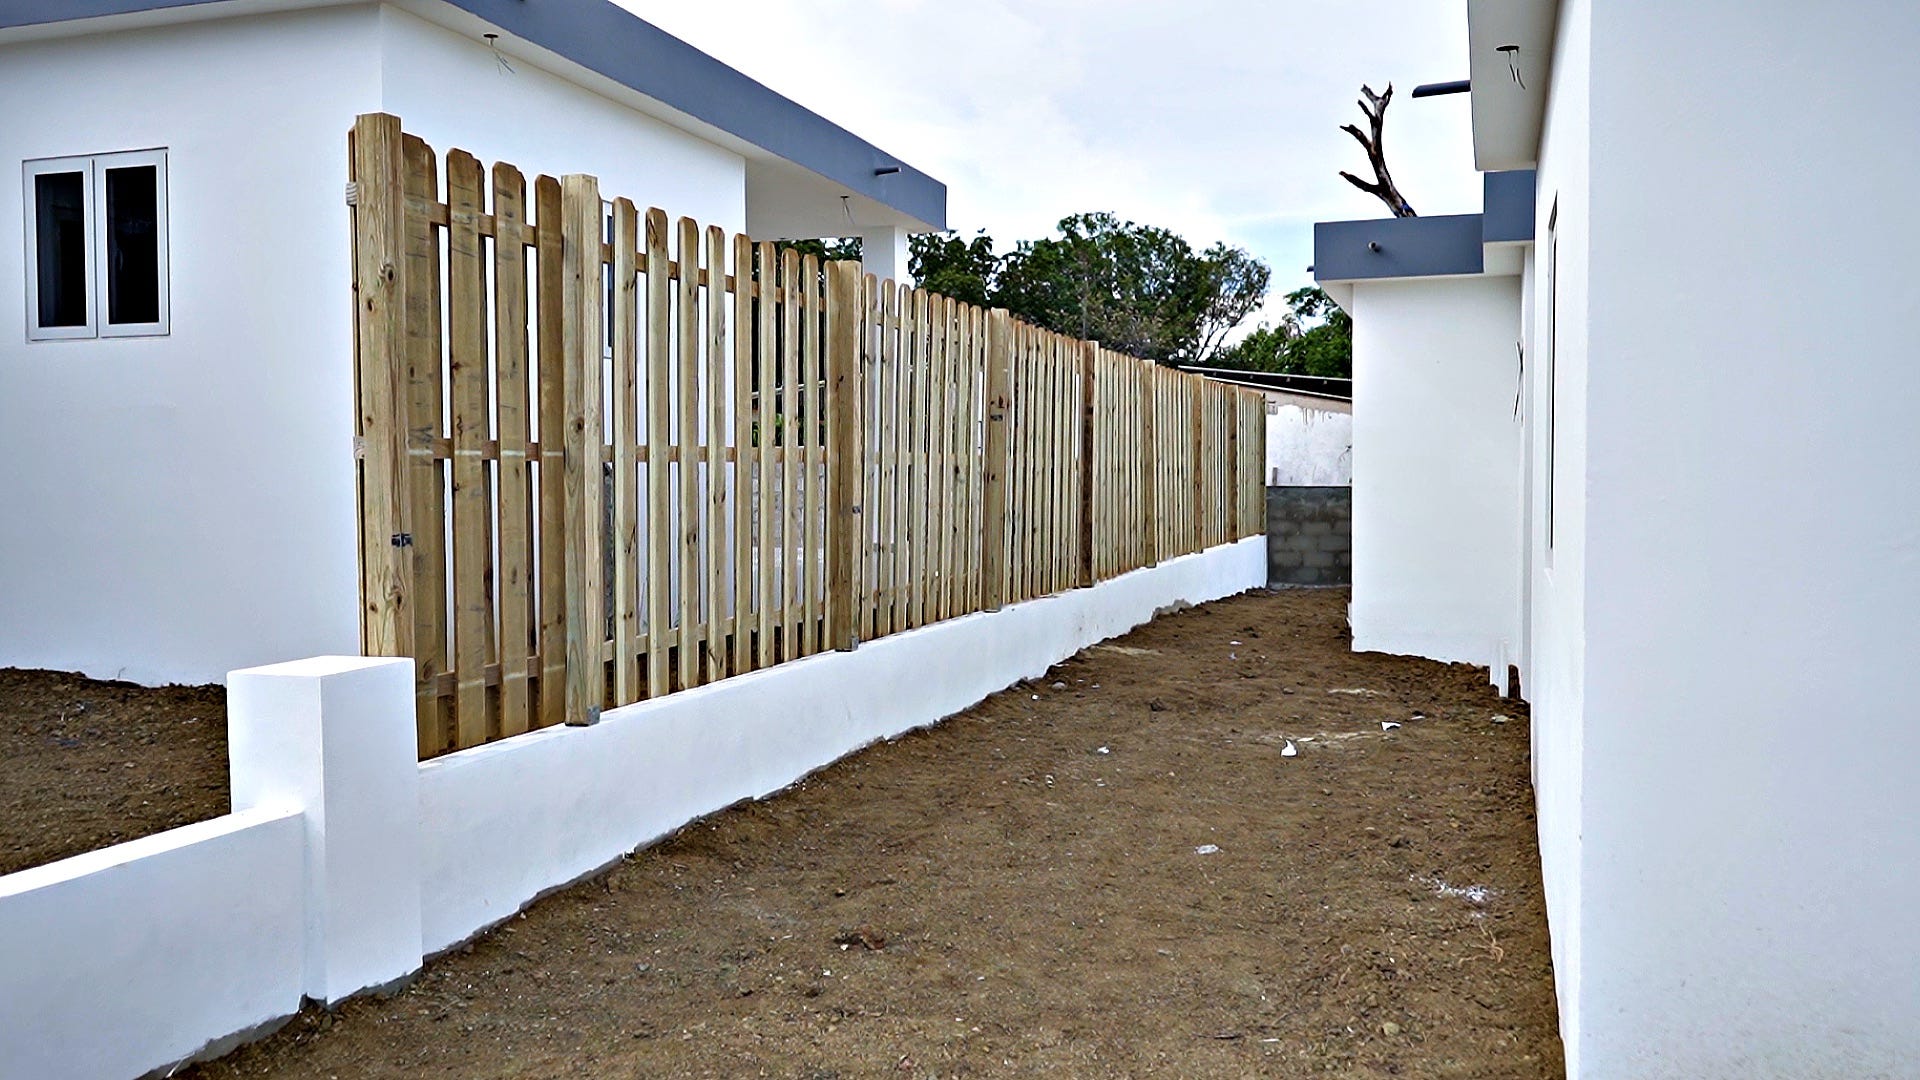
The fence is completely done except for some styling choices to be made. You can decide to paint the fence in the color that you have chosen and use wood paint or stain to match your exterior. Kooyman has a large collection of wood paints and stains to choose from. Don’t forget to let it dry and you are ready to enjoy your gorgeous new fence!